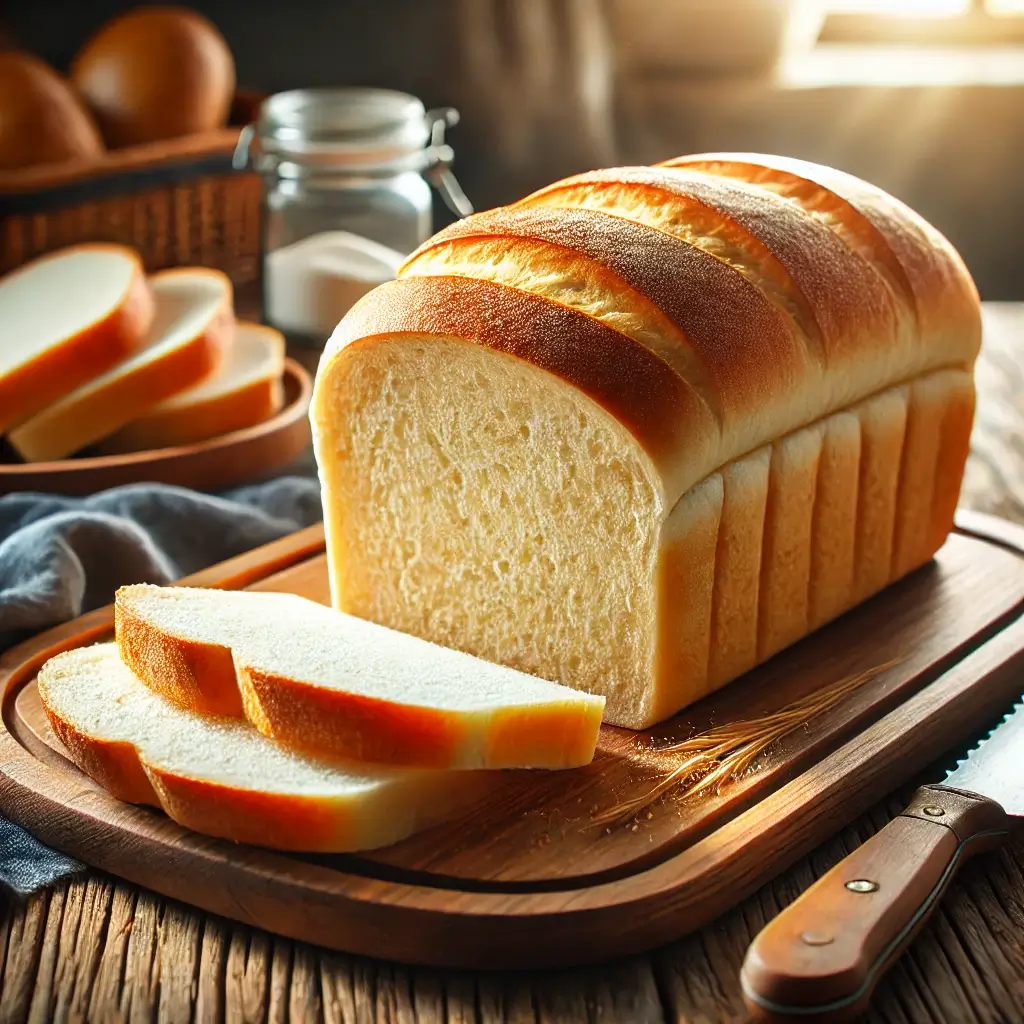
Introduction to Homemade Sandwich Bread
Homemade sandwich bread recipe is one of the simplest yet most rewarding things you can make in your kitchen. There’s something magical about the smell of fresh bread baking, the soft, airy texture when you slice it, and the satisfaction of knowing exactly what’s in each loaf. While store-bought bread often lacks the flavor and texture that homemade bread offers, making your own sandwich bread can be easier than you think. Plus, with just a few simple ingredients, you can create the perfect loaf that’s soft, fluffy, and ready for any sandwich creation.
Why Homemade Sandwich Bread Recipe is Worth the Effort
Making your own sandwich bread from scratch may seem like a time-consuming task, but the results are more than worth it. Homemade bread is not only fresher than store-bought, but you also have control over the ingredients, ensuring you’re using high-quality flour, yeast, and other fresh additions. There are no preservatives, chemicals, or artificial flavors—just wholesome, delicious bread. Plus, once you’ve mastered the recipe, you’ll find that it’s a simple process to repeat.
When you bake your own sandwich bread, you can achieve that perfect soft, fluffy texture with a tender crumb that’s hard to find in commercial loaves. Whether you’re making a classic PB&J or a gourmet sandwich, having a perfectly baked, homemade loaf to hold your ingredients is the secret to a great meal.
Benefits of Using Simple, Fresh Ingredients

Using fresh, high-quality ingredients is key to creating the best homemade sandwich bread. All-purpose flour provides the perfect balance for texture, while active dry yeast ensures the dough rises properly. Butter or olive oil adds richness and moisture, making each slice soft and flavorful. By choosing ingredients that are free from preservatives, you’re also choosing a more natural option for you and your family.
When you bake from scratch, you can customize your bread to suit your preferences. Want a slightly sweet loaf? Add a touch of honey or sugar. Want a heartier bread? Try using whole wheat flour for extra nutrients and flavor. The possibilities are endless when you control what goes into the dough.
Comparing Homemade and Store-Bought Sandwich Bread
While store-bought bread can be convenient, there’s no comparison to the taste and texture of a homemade loaf. Commercial bread often contains added preservatives to extend shelf life, which can impact its freshness and flavor. Additionally, many mass-produced breads are made with low-quality ingredients, making them less nutritious.
Homemade sandwich bread, on the other hand, is fresher, more flavorful, and free from unnecessary additives. The process of making your own bread allows you to experiment with different flavors, textures, and shapes. And let’s not forget—there’s something incredibly satisfying about slicing into a warm loaf of bread you made yourself!
Essential Ingredients for the Perfect Sandwich Bread Recipe
The secret to perfect sandwich bread lies in the simple, high-quality ingredients you use. While it may seem like just a few basic items are needed, each one plays a crucial role in creating the soft, fluffy texture and delicious flavor you desire in every slice. In this section, we’ll break down the key ingredients you’ll need to make your sandwich bread, as well as the role each one plays in the final result.
The Role of Flour: All-Purpose vs. Whole Wheat
Flour is the backbone of any bread recipe, and the type of flour you choose significantly impacts the texture and flavor of your sandwich bread. For a light, airy loaf that’s perfect for sandwiches, all-purpose flour is your best choice. It has the right protein content (around 10-12%) that ensures the dough has enough structure while still being soft.
If you’re looking for a more wholesome loaf with a heartier texture, you can substitute some of the all-purpose flour with whole wheat flour. Whole wheat flour adds a richer flavor, a slightly denser texture, and more fiber. However, it can make the dough a little heavier, so a combination of all-purpose and whole wheat flour is often ideal for a balanced loaf.
For a fluffier, softer loaf, stick to all-purpose flour as the primary flour in your recipe. If you want to experiment with different types of flour, you can try bread flour, which has a higher protein content, providing more structure to the bread, although it might be slightly less tender.
Yeast: The Secret to Soft and Fluffy Bread
Yeast is the magic ingredient that makes your bread rise and gives it that light, airy texture. The two most common types of yeast used in bread baking are active dry yeast and instant yeast. Both work well in sandwich bread recipes, but they behave slightly differently.
Active dry yeast requires activation in warm water before being added to the dough, while instant yeast can be mixed directly with the dry ingredients, making it a little more convenient. For the fluffiest, most tender sandwich bread, yeast is absolutely essential, as it helps the dough rise and develop a delicate crumb.
Make sure to proof your yeast before using it to ensure it’s still active. If your yeast doesn’t bubble and froth after being mixed with warm water and sugar, it may be expired and need to be replaced.
The Importance of Butter or Olive Oil
The addition of butter or olive oil helps to create a tender loaf with a rich flavor. Butter, in particular, adds moisture and a slight sweetness to the bread, making it soft and perfect for sandwiches. If you prefer a more neutral flavor, olive oil is a great alternative. Olive oil makes the bread softer and slightly chewy, without overwhelming the flavor.
Both butter and olive oil also help in keeping the bread fresh for a longer time, preventing it from drying out too quickly. For a more indulgent loaf, use butter, but if you prefer a lighter and slightly healthier version, olive oil is the way to go.
Optional Add-ins for Extra Flavor (e.g., honey, herbs)
While the core ingredients are simple, there’s plenty of room to get creative with your sandwich bread recipe. You can add honey for a subtle sweetness that pairs perfectly with both savory and sweet sandwiches. A teaspoon of salt will enhance the overall flavor and balance the sweetness of the dough, while herbs like rosemary, thyme, or garlic can elevate your bread to a gourmet level.
Other optional add-ins might include milk powder for a softer texture, or seeds like sesame or poppy seeds if you like a bit of crunch on top of your bread. The great thing about making your own sandwich bread is that you can tailor it to your taste preferences and dietary needs.
Step-by-Step Guide to Making the Best Sandwich Bread Recipe
Making the best sandwich bread at home is easier than you might think, and with the right technique, you can achieve a soft, fluffy, and delicious loaf every time. In this section, we’ll walk you through each step of the process, from mixing the dough to baking the perfect loaf. By following these simple steps, you’ll be able to create a homemade bread that rivals any store-bought version.
Preparing the Dough: Mixing and Kneading
The first step in making the best sandwich bread is to prepare the dough. Start by combining the dry ingredients in a large mixing bowl: flour, yeast, and salt. If you’re using sugar or honey, add it here as well. Mix these ingredients together until they’re evenly distributed.
Next, create a well in the center of your dry ingredients and add the wet ingredients: warm water (around 110°F to 115°F), butter (or olive oil), and any other liquids you’re using (like milk). Gently stir the mixture with a wooden spoon or spatula until a dough forms. If the dough feels too sticky, add a bit more flour, one tablespoon at a time, until it reaches the right consistency.
Once the dough comes together, it’s time to knead. Transfer it to a floured surface and begin kneading by pressing the dough with the palms of your hands, folding it over, and turning it. Knead for about 8-10 minutes, or until the dough becomes smooth, elastic, and slightly tacky but not sticky. If you’re using a stand mixer, you can knead the dough with the dough hook attachment on low speed for about 5-7 minutes.
The Rising Process: Why Proofing Matters
Once your dough has been kneaded, it’s time for it to rise. The rising (or proofing) process is essential for achieving a soft and airy texture in your sandwich bread. To proof the dough, form it into a ball and place it in a lightly oiled bowl. Cover the bowl with a damp kitchen towel or plastic wrap to keep the dough warm and moist.
Allow the dough to rise for about 1-2 hours, or until it has doubled in size. The yeast will work its magic, causing the dough to expand and become lighter. This step is crucial for developing the perfect texture, so don’t rush it.
Tips for Achieving the Perfect Dough Texture
- Warm Environment: Make sure your dough is rising in a warm area, away from drafts. If your kitchen is cold, you can place the bowl in an oven with the light on or near a heating source to provide warmth.
- Patience is Key: Don’t rush the rising process. If the dough doesn’t seem to be rising, give it more time. Yeast can take longer to work in cooler temperatures.
Common Mistakes to Avoid When Baking Bread
- Using water that’s too hot: If your water is too hot, it can kill the yeast, preventing the dough from rising properly. Make sure the water is warm (not hot) to the touch, around 110°F.
- Overworking the dough: Kneading the dough too much or too aggressively can cause the bread to be dense. It’s important to knead just until the dough is smooth and elastic.
Shaping and Second Rising
After the dough has doubled in size, gently punch it down to release any air bubbles. This step is called “degassing” the dough. Once it’s deflated, transfer the dough to a lightly floured surface and shape it into a loaf. To do this, flatten the dough into a rectangle, then roll it up tightly, pinching the seams as you go. Tuck the edges under and place the dough seam-side down in a greased loaf pan.
Cover the loaf pan with a damp towel and let the dough rise for another 30-60 minutes, or until it has risen just above the edge of the pan. This second rise allows the bread to develop an even texture throughout.
Baking the Bread: Oven Temperature and Timing
Once the dough has finished rising, it’s time to bake the bread. Preheat your oven to 350°F (175°C). Make sure the oven has reached the correct temperature before placing the loaf inside. This ensures the bread will bake evenly.
Place the loaf pan in the oven and bake for 25-30 minutes, or until the bread is golden brown on top and sounds hollow when tapped on the bottom. If you’re using a bread thermometer, check that the internal temperature of the bread has reached about 190°F (88°C).
How to Test if Your Bread is Fully Baked
To test if your bread is done, tap the top gently with your knuckles. If it sounds hollow, it’s baked through. If it sounds dense, the bread may need a few more minutes. You can also use a kitchen thermometer to check the internal temperature. Once it reaches 190°F, it’s ready.
Baking and Perfecting Your Sandwich Bread Recipe
Baking is the final and crucial step in creating the perfect sandwich bread. Once your dough has risen and been shaped, it’s time to transform it into a golden, soft, and fluffy loaf. However, the baking process requires attention to detail to ensure your bread turns out perfectly every time. In this section, we’ll guide you through the key steps involved in baking and perfecting your sandwich bread, including oven temperature, baking time, and tips for achieving a flawless finish.
Oven Temperature and Baking Time for a Golden Loaf
Achieving the perfect sandwich bread involves more than just popping the loaf into the oven. The right oven temperature and timing are essential for developing a beautiful, golden crust and a soft, airy crumb inside.
Preheat your oven to 350°F (175°C). This is the ideal temperature for baking sandwich bread, allowing it to bake through without over-browning or burning. Ensure that your oven is fully preheated before you put your loaf in, as this ensures an even baking environment from the start.
Once the oven is ready, place your loaf pan in the center of the oven. Baking typically takes 25 to 30 minutes, but the exact time will vary depending on the size of your loaf and your oven. Keep a close eye on your bread as it bakes, checking for golden brown color and a slight rise in the center.
How to Test if Your Bread is Fully Baked
While visual cues like a golden-brown crust are important, the true test of whether your sandwich bread is done involves checking its internal temperature and texture.
- Tap the Bottom: After the recommended baking time, carefully remove the loaf from the pan and tap the bottom. If it sounds hollow, your bread is fully baked. This hollow sound indicates that the air inside has been completely baked out, resulting in a light, fluffy loaf.
- Use a Thermometer: For even more precision, you can use an instant-read kitchen thermometer. Insert the thermometer into the center of the bread—if it reads 190°F (88°C), your bread is done. This internal temperature ensures the bread is fully cooked and has the perfect texture.
- Check the Color: The top of your bread should be golden brown. If it’s too pale, give it a few extra minutes. However, if it’s browning too quickly, you can cover the top of the loaf with aluminum foil to prevent it from burning.
Creating a Beautiful, Crispy Crust
The crust is an important aspect of the overall bread experience. For a crispy, golden crust, there are a few techniques you can use:
- Steam: Some bakers prefer to add steam to the oven during the first few minutes of baking. You can do this by placing a small pan of water on the bottom rack of the oven while the bread bakes. The steam helps create a crispier, shinier crust.
- Egg Wash: For a slightly richer and more golden crust, you can brush the top of your loaf with an egg wash before baking. This is simply a mixture of one beaten egg and a tablespoon of water. Brush it on the top of the loaf right before you place it in the oven.
Cooling Your Bread: Why It’s Important
Once your bread is baked to perfection, it’s important to let it cool properly before slicing. Cooling your bread allows the internal structure to set, making it easier to slice and preventing it from becoming gummy.
Remove your loaf from the pan and place it on a wire rack to cool. Let the bread cool for about 30-45 minutes before cutting into it. Cutting too soon can result in a squished, uneven loaf and make it difficult to get clean slices. Patience is key!
Troubleshooting Common Baking Problems
Even the most experienced bakers face occasional issues when baking bread. Here are some common problems and how to solve them:
- Bread is Too Dense: If your bread is dense or heavy, it could be due to under-kneading, not enough rising time, or not enough yeast. Ensure the dough is kneaded until smooth and elastic, and give it plenty of time to rise before baking.
- Bread Crust is Too Thick or Hard: A very thick or hard crust may be a result of baking at too high a temperature. Try lowering the temperature slightly or covering the loaf with foil toward the end of the baking time to prevent over-browning.
- Bread Doesn’t Rise Properly: If the dough doesn’t rise as expected, the yeast may have been too old or the rising environment may have been too cool. Make sure your yeast is fresh and the dough is placed in a warm spot for optimal rising.
Look at this
Check out these recipes
How to Store and Use Your Homemade Sandwich Bread
Once you’ve put in the time and effort to create a perfect loaf of homemade sandwich bread, it’s important to know how to store and use it to maintain its freshness and flavor. Proper storage can extend the shelf life of your bread, while creative uses ensure none of it goes to waste. In this section, we’ll share the best practices for storing homemade sandwich bread and offer ideas on how to enjoy it in a variety of delicious ways.
Storing Homemade Bread for Freshness
Homemade bread is free from preservatives, so it tends to have a shorter shelf life than store-bought bread. However, with the right storage methods, you can keep your loaf fresh for several days or even longer.
- Room Temperature Storage:
- Wrap in a Cloth or Paper Bag: To keep your homemade sandwich bread fresh for up to 3-4 days, wrap it in a clean kitchen towel or place it in a paper bag. The cloth will allow the bread to breathe while maintaining its moisture without causing it to become soggy.
- Breadbox: A breadbox is another excellent storage option. The controlled environment inside the box keeps the bread from drying out too quickly while preventing moisture buildup, which can lead to mold.
- Plastic Bag or Bread Bag:
- If you want to extend the freshness a bit longer, you can store your bread in a plastic bag. However, be cautious with this method, as it can soften the crust. For the best results, use a bread bag designed specifically for homemade bread, which allows some air circulation while keeping it moist.
- Avoid the Refrigerator:
- While refrigeration might seem like a good idea to prevent mold, it actually speeds up the staling process for most homemade breads. The cold air in the fridge dries out the bread, making it less enjoyable. It’s best to store homemade bread at room temperature unless you need to freeze it.
Freezing Sandwich Bread for Later Use
If you’ve made a large batch of bread or simply want to have some bread ready for later, freezing is a great way to preserve your loaf without compromising its quality.
- How to Freeze Whole Loaves:
- Let the bread cool completely before freezing. If you freeze the bread while it’s still warm, condensation can form inside the packaging, making the bread soggy.
- Wrap the entire loaf tightly in plastic wrap or foil. Then, place it in a freezer-safe bag or container to prevent freezer burn. When stored properly, a whole loaf can last up to 3 months in the freezer.
- Freezing Slices for Convenience:
- If you want to be able to grab a slice or two at a time, consider slicing the bread before freezing it. Place a sheet of parchment paper between slices to prevent them from sticking together.
- Wrap the sliced bread in plastic wrap and store it in a freezer-safe bag. Frozen slices can be toasted directly from the freezer for a quick and fresh breakfast or snack.
- Thawing and Reheating:
- To thaw a frozen loaf, simply remove it from the freezer and let it come to room temperature for several hours. If you’re in a hurry, you can thaw it in a preheated oven at 300°F (150°C) for 10-15 minutes.
- For frozen slices, you can toast them straight from the freezer, or thaw them at room temperature for a few hours.
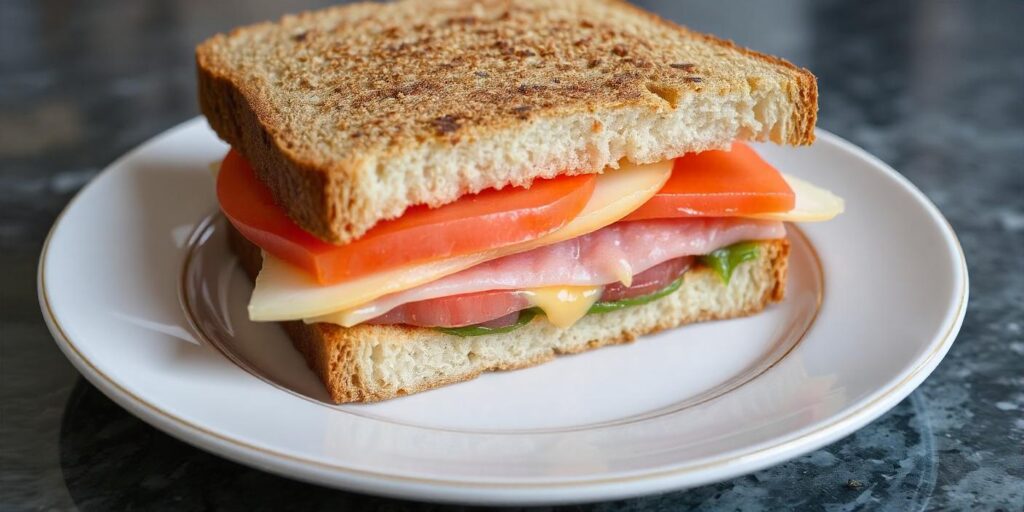
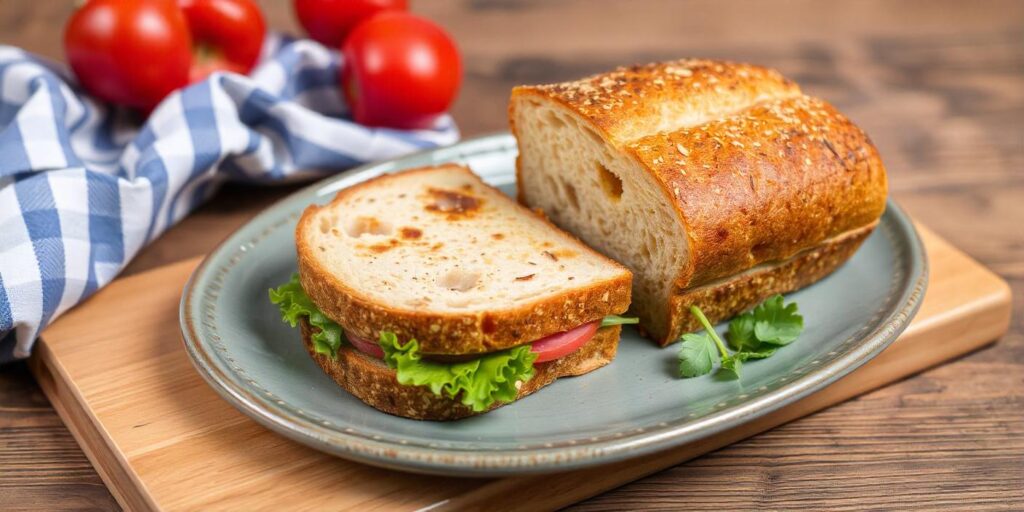
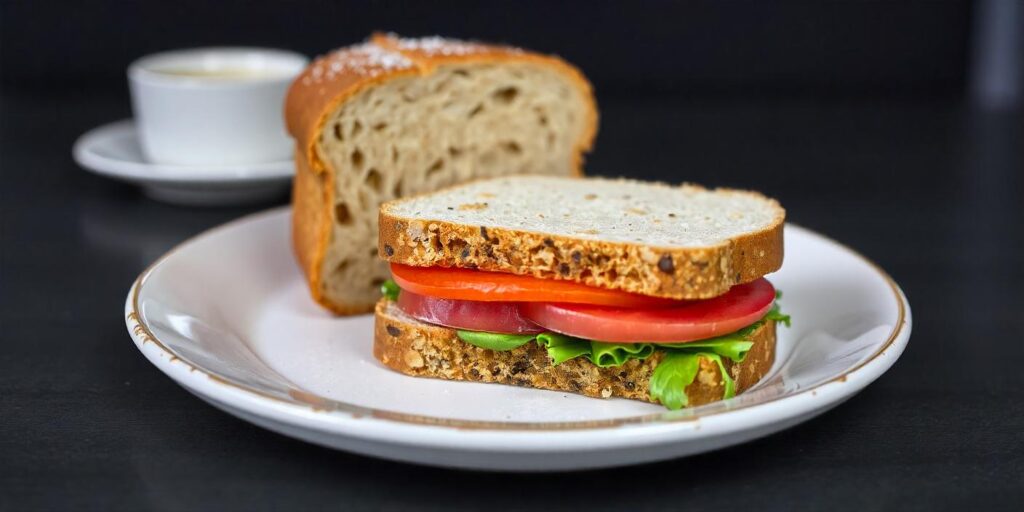
Creative Ways to Use Your Sandwich Bread (e.g., sandwiches, toast)
While homemade sandwich bread is perfect for making classic sandwiches, its versatility doesn’t end there. Here are some creative ways to use your loaf:
- Classic Sandwiches: Of course, homemade sandwich bread is perfect for any kind of sandwich. From the simple PB&J to more elaborate creations like turkey and avocado, the soft, fluffy texture of the bread elevates the sandwich experience.
- Grilled Cheese: Take your homemade sandwich bread to the next level with a grilled cheese sandwich. The rich, buttery texture of the bread crisps up beautifully in a hot pan, while the soft interior melts perfectly with your favorite cheese.
- Toast: Homemade bread makes the best toast! Whether you top it with butter, jam, avocado, or even eggs, the warm and crispy toast is an ideal breakfast or snack. The slightly chewy texture of homemade bread holds up well to toppings, offering a more satisfying bite than store-bought varieties.
- Bread Crumbs: If you find yourself with leftover bread, don’t let it go to waste. Simply cut it into cubes and toast them in the oven to make your own homemade bread crumbs. Use them for breading chicken, topping casseroles, or adding a crunchy element to salads.
- Bread Pudding: Another great way to use up stale or leftover bread is by making bread pudding. Cube the bread, soak it in a custard mixture (eggs, milk, sugar, and spices), and bake it for a delicious dessert. It’s a great way to repurpose bread that’s starting to lose its freshness.
- French Toast: Use your homemade bread to make classic French toast. The bread’s soft, slightly sweet texture soaks up the egg mixture perfectly, making for a rich and flavorful breakfast dish.
Turning Leftovers into Delicious Croutons or Panzanella
If you have extra slices or a leftover loaf of bread, consider turning them into croutons or panzanella. Croutons can be made by cutting bread into cubes, tossing with olive oil, herbs, and garlic, and baking until golden and crispy. These croutons are perfect for soups or salads.
Panzanella, an Italian bread salad, is another great way to use up old bread. Simply tear the bread into chunks and toss it with fresh vegetables like tomatoes, cucumbers, and red onions, along with olive oil, vinegar, and herbs. The bread soaks up the dressing, becoming soft and flavorful.
Enjoying the Fruits of Your Labor: The Satisfaction of Homemade Sandwich Bread
Making your own sandwich bread is not just about creating a delicious loaf; it’s about the satisfaction that comes from crafting something with your own hands. From selecting quality ingredients to kneading the dough and watching it rise, every step in the process contributes to the end result. When you finally pull that golden, soft loaf out of the oven, there’s a sense of accomplishment that comes with knowing you’ve created something from scratch. Whether it’s for your family’s lunches, a gathering with friends, or simply enjoying a slice with butter, homemade sandwich bread elevates every meal.
Perfect for Any Meal: Versatility of Homemade Sandwich Bread
The beauty of homemade sandwich bread lies in its versatility. It’s not just for sandwiches—though it certainly excels in that area! You can use it for a variety of recipes, from grilled cheese to French toast, bread pudding, and even croutons. The soft, fluffy texture makes it perfect for toasting or pairing with soups and salads. No matter how you choose to enjoy it, your homemade bread adds a personal touch to every meal.
Storing and Using Bread Made Easy
Once you’ve created your perfect loaf, knowing how to store and use it is just as important. Whether you prefer to keep it fresh at room temperature, freeze it for later, or turn it into delicious recipes like croutons or bread pudding, there are plenty of ways to enjoy your bread over time. With the right storage techniques, your bread can stay fresh for days, ensuring that every slice is as enjoyable as the first. And if you find yourself with leftover bread, don’t worry—there are countless creative uses for it, ensuring none of it goes to waste.
Share Your Creation and Spread the Joy
Homemade sandwich bread is a wonderful treat to share with others. Whether you’re baking it for your family, hosting a gathering, or gifting a loaf to a friend, homemade bread brings people together in a way that store-bought loaves simply can’t match. The warmth and love that go into every loaf are felt by those who taste it, making it a perfect addition to any occasion. So, next time you bake, consider sharing the joy of your freshly baked bread with someone special!
Pair this perfect sandwich bread with our Egg Salad Recipe. It’s the ideal filling for a delicious homemade sandwich