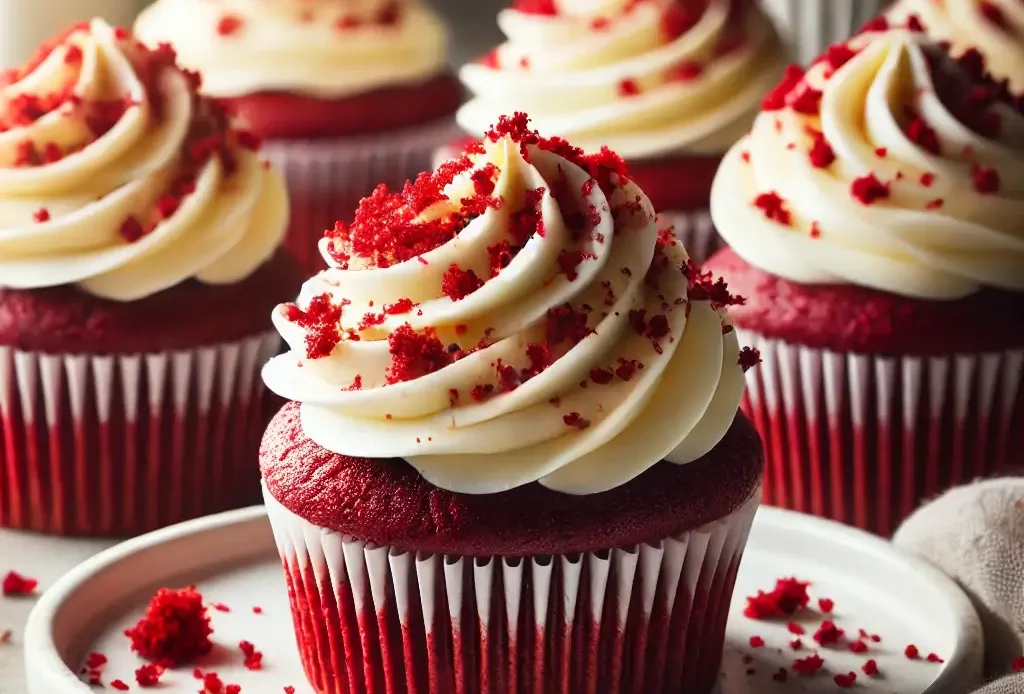
Red velvet cupcakes are a timeless dessert, beloved for their striking red color, velvety texture, and rich yet subtle chocolate flavor. Unlike regular chocolate or vanilla cupcakes, a red velvet cupcake recipe offers a unique balance of flavors—mild cocoa, a slight tang from buttermilk and vinegar, and a hint of sweetness that pairs beautifully with cream cheese frosting. The best red velvet cupcake recipe ensures their delicate, airy texture and melt-in-your-mouth quality, making them a favorite for special occasions, from birthdays to weddings.
This best red velvet cupcake recipe stands out because it ensures cupcakes that are:
- Moist – Achieved with the perfect balance of buttermilk and oil in the red velvet cupcake recipe.
- Fluffy – Thanks to the reaction between baking soda and vinegar, which creates a light, tender crumb in every red velvet cupcake recipe.
- Rich in flavor – A subtle blend of cocoa and vanilla, complemented by the signature tanginess in this red velvet cupcake recipe.
- This variation adds more focus on the recipe while keeping it readable!
Why Quality Ingredients Matter
Using high-quality ingredients is key to achieving the perfect red velvet cupcake:
- Buttermilk – Adds moisture, tenderness, and a slight tang that enhances the cupcake’s complexity.
- Cocoa Powder – Provides a delicate chocolate undertone without overpowering the signature red velvet flavor.
- Vinegar – Reacts with baking soda to create air pockets, making the cupcakes ultra-light and fluffy.
- Cream Cheese Frosting – A must-have pairing that balances the sweetness with a creamy, tangy finish.
With the right combination of ingredients and techniques, this red velvet cupcake recipe delivers bakery-quality results at home—moist, fluffy, and absolutely irresistible. Now, let’s dive into what makes a perfect red velvet cupcake and how you can master this recipe step by step.
What Makes a Perfect Red Velvet Cupcake?
Red velvet cupcakes are more than just a pretty treat—they have a distinct taste and texture that set them apart from other cupcakes. A perfect red velvet cupcake should be moist, fluffy, and tender with a delicate chocolate undertone and a slight tang. The secret lies in the right balance of ingredients and the science behind their interaction. Let’s break down the key components that contribute to the perfect red velvet cupcake.
The Key Ingredients for Moist and Fluffy Cupcakes
1. Importance of Buttermilk and Vinegar for Texture
Buttermilk and vinegar are essential for achieving the signature soft and tender crumb of red velvet cupcakes.
- Buttermilk: This acidic ingredient tenderizes the gluten in the flour, resulting in a moist and light cupcake. It also enhances the subtle tang that makes red velvet unique.
- Vinegar: Often used in combination with baking soda, vinegar creates air pockets in the batter, giving the cupcakes a fluffy, airy texture. It also helps brighten the red color of the cupcakes by reacting with the cocoa powder.
2. Role of Cocoa Powder and Baking Soda in the Recipe
While red velvet cupcakes are not as chocolatey as traditional chocolate cupcakes, cocoa powder plays a vital role in their flavor and texture.
- Cocoa Powder: A small amount of unsweetened cocoa powder adds a mild chocolate flavor and contributes to the cupcake’s velvety texture. It also interacts with the acidic ingredients (buttermilk and vinegar) to enhance the color.
- Baking Soda: This leavening agent reacts with vinegar, creating carbon dioxide bubbles that help the cupcakes rise and stay light. Without it, red velvet cupcakes would be dense and heavy.
3. Why Vanilla Extract Enhances the Flavor
Vanilla extract is a crucial ingredient in red velvet cupcakes because:
- It balances the tanginess of buttermilk and vinegar.
- It adds a warm, sweet aroma that complements the cocoa.
- It enhances the overall depth of flavor, making the cupcakes more aromatic and appealing.
Using pure vanilla extract instead of artificial vanilla gives a richer and more natural taste to your cupcakes.
The Science Behind the Classic Red Velvet Texture
A perfect red velvet cupcake has a tender, velvety crumb that practically melts in your mouth. This texture comes from the way acidic and alkaline ingredients interact in the batter.
1. How the Combination of Ingredients Creates a Tender Crumb
Red velvet cupcakes achieve their soft, delicate texture through the careful balance of fat, liquid, and acidic components:
- Fat (Oil or Butter): Keeps the cupcakes moist.
- Buttermilk & Vinegar: Tenderize the flour, preventing the cupcakes from becoming tough.
- Baking Soda: Provides lift and aeration, preventing denseness.
Together, these ingredients weaken gluten formation, making the cupcakes tender instead of chewy.
2. Why Baking Soda Reacts with Vinegar for a Light, Airy Texture
Baking soda is an alkaline ingredient, while vinegar is acidic. When combined, they produce carbon dioxide bubbles, which help the cupcakes rise in the oven.
This reaction is crucial for achieving a fluffy, airy texture without needin
Choosing the Right Food Coloring for That Signature Red Hue
One of the most iconic features of red velvet cupcakes is their vibrant red color. The deep red hue was traditionally a result of natural reactions between acidic ingredients and cocoa powder. However, modern recipes often use food coloring to achieve a more consistent and bold red shade.
1. Natural vs. Artificial Food Coloring Options
- Artificial Food Coloring (Liquid, Gel, or Powder):
- The most common way to achieve the deep red color.
- Gel food coloring is preferred because it provides a vibrant hue without adding excess liquid to the batter.
- Brands like Americolor or Wilton produce highly pigmented gels that work well for red velvet cupcakes.
- Natural Food Coloring Alternatives:
- Beetroot Powder or Beet Juice: Provides a natural red hue and adds a slight earthy sweetness.
- Pomegranate or Raspberry Powder: Less common but can add a reddish tint.
- Hibiscus Powder: Offers a rich, pinkish-red color and a hint of floral tang.
2. Alternative Ways to Get the Red Color Without Food Dye
If you prefer to avoid food coloring, you can still achieve a reddish hue naturally:
- Use high-quality cocoa powder that reacts well with vinegar and buttermilk to enhance the reddish-brown undertone.
- Increase the amount of beetroot powder or natural acidic ingredients to deepen the red color.
- Keep in mind that natural colors may be less vibrant than artificial dyes, but they offer a wholesome alternative.
Final Thoughts
The perfect red velvet cupcake isn’t just about its stunning red color—it’s a science-backed balance of ingredients that creates a soft, moist, and flavorful treat. By using buttermilk, vinegar, cocoa powder, and baking soda in just the right proportions, you can achieve bakery-quality cupcakes at home. Now that you understand what makes red velvet cupcakes so special, let’s move on to the step-by-step process of making them!
Step-by-Step Guide to Making the Best Red Velvet Cupcakes
Now that you understand the key ingredients and the science behind red velvet cupcakes, it’s time to put everything into action. Follow this step-by-step guide to ensure your cupcakes turn out moist, fluffy, and irresistibly delicious every time.
Preparing Your Ingredients and Tools
Before you start baking, it’s essential to have everything prepared. This ensures a smooth process and helps you avoid mistakes.
1. List of Ingredients Needed
Gather all the necessary ingredients to achieve the perfect red velvet cupcakes:
- Dry Ingredients:
- 2 ½ cups (310g) all-purpose flour
- 2 tablespoons unsweetened cocoa powder
- 1 teaspoon baking soda
- ½ teaspoon salt
- Wet Ingredients:
- 1 cup (240ml) buttermilk
- 1 cup (200g) granulated sugar
- ½ cup (120ml) vegetable oil (or softened butter for a richer taste)
- 2 large eggs
- 1 teaspoon vanilla extract
- 1 teaspoon white vinegar
- 1 tablespoon red food coloring (gel preferred for vibrant color)
- For the Cream Cheese Frosting:
- 8 oz (225g) cream cheese, softened
- ½ cup (115g) unsalted butter, softened
- 2 cups (240g) powdered sugar
- 1 teaspoon vanilla extract
2. Kitchen Tools Required
To make the baking process smooth, ensure you have the following tools:
- Mixing bowls – For dry and wet ingredients.
- Electric mixer or hand whisk – To cream the sugar and mix the batter evenly.
- Measuring cups and spoons – For accurate ingredient measurements.
- Sifter – To aerate the flour and cocoa powder, preventing lumps.
- Cupcake liners – To keep the cupcakes from sticking to the pan.
- Muffin or cupcake pan – Standard 12-cup size works best.
- Cooling rack – Helps prevent soggy bottoms.
- Piping bag with a frosting tip – If you want to decorate with a professional touch.
Once everything is ready, preheat your oven to 350°F (175°C) and line your cupcake pan with liners. Now, let’s start making the batter!
Mixing the Batter for Perfect Consistency
A good red velvet batter should be smooth, well-mixed, and lightly thick but pourable. Follow these steps carefully to ensure the right consistency.
1. Mix the Dry Ingredients
- In a large bowl, sift together the flour, cocoa powder, baking soda, and salt. Sifting helps remove lumps and aerates the ingredients for a lighter texture.
- Whisk everything together to ensure even distribution.
2. Beat the Wet Ingredients
- In another large mixing bowl, beat sugar and oil (or butter) until smooth.
- Add eggs one at a time, mixing well after each addition.
- Stir in vanilla extract, vinegar, and red food coloring until fully combined.
3. Combine Wet and Dry Ingredients
- Alternate adding the dry ingredients and buttermilk to the wet mixture.
- Start with dry ingredients, mix lightly.
- Pour in half the buttermilk, mix gently.
- Add the remaining dry ingredients, then the rest of the buttermilk.
- Use a spatula to fold everything together gently.
4. The Importance of Not Overmixing
Overmixing can lead to dense, tough cupcakes because it overdevelops the gluten in the flour.
- Mix just until combined—the batter should be smooth but not overworked.
- If you see a few streaks of flour, that’s okay; they will incorporate when baking.
Once your batter is ready, it’s time to bake!
Baking and Cooling Your Cupcakes the Right Way
Proper baking techniques ensure your cupcakes turn out perfectly risen and fluffy. Follow these steps carefully.
1. Best Oven Temperature and Baking Time
- Preheat oven to 350°F (175°C) for at least 10 minutes before baking.
- Fill each cupcake liner about ⅔ full with batter to allow room for rising.
- Bake for 18–22 minutes until a toothpick inserted in the center comes out clean.
2. How to Test for Doneness
- Insert a toothpick into the center of a cupcake; if it comes out clean or with a few dry crumbs, they’re ready.
- Lightly press the top of a cupcake—if it springs back, it’s done baking.
- Avoid overbaking, as this can dry out your cupcakes.
3. Cooling Tips to Prevent Soggy Cupcakes
- Remove the cupcakes from the oven and let them sit in the pan for 5 minutes.
- Transfer them to a cooling rack to prevent steam from making the liners soggy.
- Let them cool completely before frosting—if they are still warm, the frosting will melt.
Now that your cupcakes are baked and perfectly cooled, it’s time to move on to the best cream cheese frosting to top them off!
The Best Cream Cheese Frosting for Red Velvet Cupcakes

No red velvet cupcake is complete without a rich, smooth, and slightly tangy cream cheese frosting. This frosting perfectly complements the cupcake’s mild cocoa flavor and adds a luxurious, creamy finish. Whether you prefer a light spread or beautifully piped swirls, this guide will help you achieve the best frosting texture and flavor.
Ingredients Needed for a Smooth, Tangy Frosting
A well-balanced cream cheese frosting should be smooth, rich, and tangy with just the right amount of sweetness. The key lies in using high-quality ingredients.
1. Why Philadelphia Cream Cheese and Powdered Sugar Work Best
- Philadelphia Cream Cheese (or any full-fat brand):
- Full-fat cream cheese gives the frosting a smooth, creamy texture and a signature tangy flavor.
- Avoid low-fat or spreadable cream cheese, as they contain more water and can make the frosting runny.
- Powdered Sugar (Confectioners’ Sugar):
- Dissolves easily, creating a smooth, lump-free texture.
- Provides the right level of sweetness without making the frosting grainy (unlike granulated sugar).
2. How Butter and Vanilla Extract Enhance the Flavor
- Unsalted Butter:
- Softened butter adds richness and helps stabilize the frosting.
- It also ensures a creamy, spreadable consistency when whipped with cream cheese.
- Vanilla Extract:
- A small amount of pure vanilla extract enhances the flavor and balances the tanginess.
- It adds depth and complements the sweetness of the powdered sugar.
Ingredient List for the Perfect Cream Cheese Frosting
- 8 oz (225g) full-fat cream cheese, softened
- ½ cup (115g) unsalted butter, softened
- 2 cups (240g) powdered sugar, sifted
- 1 teaspoon vanilla extract
- Optional: 1–2 tablespoons heavy cream or milk (for adjusting consistency)
Now that we have the ingredients ready, let’s move on to the step-by-step guide for making the smoothest cream cheese frosting.
Step-by-Step Frosting Guide
Making cream cheese frosting is simple, but the right technique ensures a smooth, fluffy, and pipeable consistency.
1. How to Whip the Perfect Creamy Frosting
- Step 1: In a large mixing bowl, beat the butter on medium speed until light and creamy (about 1–2 minutes).
- Step 2: Add the cream cheese and continue beating until fully combined and smooth (about 2 minutes).
- Step 3: Gradually add sifted powdered sugar, one cup at a time, mixing on low speed to prevent a sugar cloud.
- Step 4: Add vanilla extract and mix until incorporated.
- Step 5: Increase the mixer speed to medium-high and beat for an additional 2–3 minutes until light and fluffy.
2. Adjusting Consistency for Piping or Spreading
- For a Thicker Frosting (Best for Piping):
- Add ½ cup more powdered sugar to make it firmer.
- Refrigerate for 15–20 minutes before piping.
- For a Softer, Spreadable Frosting:
- Add 1–2 tablespoons of heavy cream or milk and mix until you reach a creamy, spreadable consistency.
At this stage, your cream cheese frosting is ready to use! Now, let’s explore how to decorate your cupcakes like a pro.
Decorating Your Cupcakes Like a Pro
The way you frost your cupcakes can elevate their appearance from homemade to bakery-quality masterpieces. Whether you use a spatula or a piping bag, here are some techniques to make your cupcakes look stunning.
1. Piping Techniques for Bakery-Style Cupcakes
- Classic Swirl: Use a large round tip (such as Wilton 1A) to create a smooth, elegant swirl.
- Rosette Design: Use a star tip (such as Wilton 2D) and pipe in a circular motion from the center outward.
- Tall Swirls: Use a French star tip (such as Wilton 8B) to create dramatic, tall frosting swirls.
How to Pipe Like a Pro:
- Fill a piping bag with frosting and twist the top to secure.
- Hold the bag at a 90-degree angle over the cupcake.
- Apply even pressure and move in a circular motion for smooth swirls.
- Lift the tip gently at the end for a clean finish.
2. Optional Toppings for Extra Elegance
While red velvet cupcakes are already beautiful, these optional toppings can enhance their appearance and flavor:
- Red Velvet Crumbs – Sprinkle some crumbs from a cupcake to add texture and color.
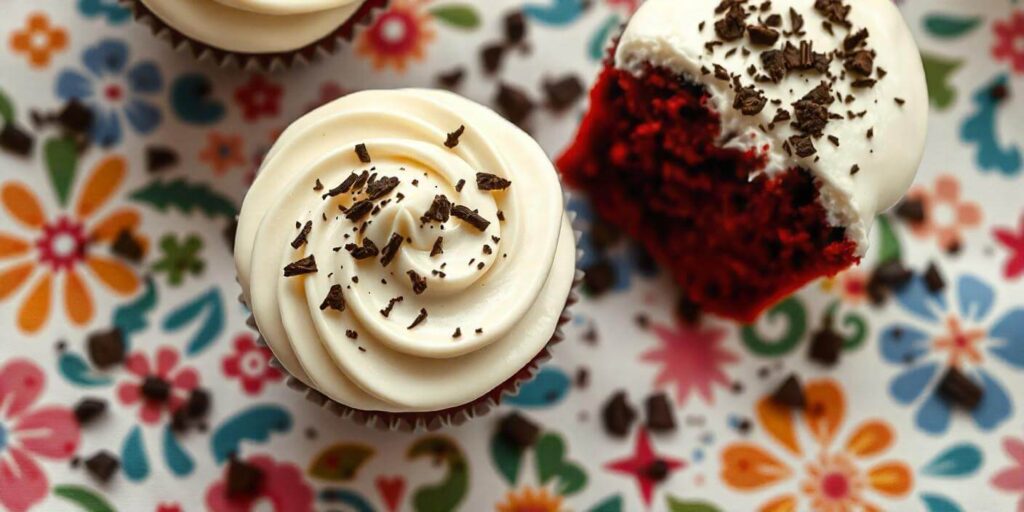
- White Chocolate Shavings – Adds a touch of elegance and sweetness.
- Sprinkles or Pearls – Use red, gold, or silver sprinkles for a festive look.
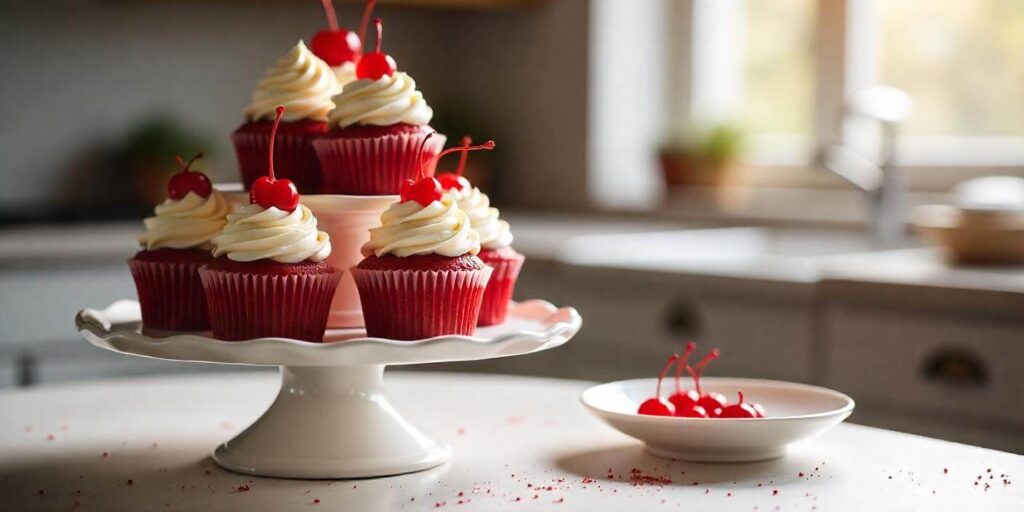
- Fresh Berries – A raspberry or strawberry on top adds a fresh, tangy contrast.
Final Thoughts
A perfect red velvet cupcake deserves the best cream cheese frosting—smooth, creamy, and with just the right balance of tang and sweetness. By following this guide, you can achieve flawless frosting that is easy to pipe, spread, and decorate beautifully.
Now that your cupcakes are frosted to perfection, let’s move on to storage tips and frequently asked questions to ensure they stay fresh and delicious!
FAQs and Pro Tips for Perfect Red Velvet Cupcakes
Baking the perfect red velvet cupcakes requires precision, but even the best bakers have questions! Below are some frequently asked questions and expert tips to help you achieve consistently moist, fluffy, and flavorful cupcakes.
How to Store and Keep Your Cupcakes Fresh
Proper storage ensures your cupcakes stay soft and delicious for days. Here’s how to keep them fresh.
1. Best Ways to Store Cupcakes at Room Temperature or in the Fridge
- Room Temperature (Best for 1–2 Days):
- Store unfrosted cupcakes in an airtight container at room temperature for up to 2 days.
- If cupcakes are frosted with cream cheese frosting, refrigerate them after 4–6 hours to prevent spoilage.
- Refrigeration (Best for 3–5 Days):
- Place cupcakes in an airtight container to prevent drying out.
- Bring them to room temperature before serving, as cold cupcakes can become dense.
2. Freezing Tips for Long-Term Storage
- For Unfrosted Cupcakes:
- Wrap each cupcake individually in plastic wrap and store in a freezer bag for up to 3 months.
- Thaw at room temperature for about 1 hour before frosting.
- For Frosted Cupcakes:
- Place cupcakes in a single layer inside an airtight container.
- Freeze for up to 2 months, then thaw overnight in the fridge before serving.
Can I Make These Cupcakes Gluten-Free or Vegan?
Yes! Red velvet cupcakes can be modified for different dietary needs. Here’s how to make them gluten-free or vegan without compromising taste or texture.
1. Substitutes for Buttermilk, Eggs, and Flour for Dietary Needs
- Gluten-Free:
- Use a 1:1 gluten-free baking flour (e.g., Bob’s Red Mill or King Arthur).
- Add 1 teaspoon xanthan gum if your flour blend doesn’t already include it for structure.
- Vegan:
- Egg Substitute: Use 1 tablespoon apple cider vinegar + ¼ teaspoon baking soda per egg.
- Buttermilk Substitute: Mix 1 cup unsweetened almond milk with 1 tablespoon vinegar.
- Dairy-Free Cream Cheese Frosting: Use vegan butter and dairy-free cream cheese (e.g., Violife, Kite Hill).
2. Recommended Brands for Gluten-Free and Vegan Baking
- Gluten-Free Flour: King Arthur Measure-for-Measure, Bob’s Red Mill 1:1
- Vegan Butter: Earth Balance, Miyoko’s
- Dairy-Free Cream Cheese: Violife, Kite Hill, Tofutti
Common Mistakes to Avoid When Making Red Velvet Cupcakes
Even experienced bakers can run into issues. Avoid these common mistakes for perfectly textured and flavorful cupcakes.
1. Overmixing the Batter
- Overmixing develops too much gluten, leading to dense or rubbery cupcakes.
- Solution: Mix just until combined—a few lumps in the batter are okay!
2. Using the Wrong Type of Food Coloring
- Liquid food coloring is too diluted and may affect the consistency of the batter.
- Solution: Use gel or paste food coloring (like Americolor or Wilton) for a vibrant red hue.
3. Not Measuring Ingredients Correctly
Solution: Always spoon and level your flour (don’t scoop directly from the bag). Use a kitchen scale for accuracy.
Using too much or too little of certain ingredients can ruin the texture.
Final Thoughts
Mastering red velvet cupcakes is all about using quality ingredients, precise measurements, and proper techniques. With these storage tips, dietary adaptations, and expert baking advice, you’re well on your way to baking the most irresistible red velvet cupcakes every time!
Now, it’s time to enjoy your delicious cupcakes—or share them with friends and family!
Look at this
Check out these recipes
Conclusion
In conclusion, this Red Velvet Cupcake recipe offers everything you could want in a delicious dessert: moist, fluffy, rich in flavor, and topped with the perfect tangy cream cheese frosting. The combination of quality ingredients—like buttermilk, cocoa powder, and vinegar—along with the proper technique, ensures that your cupcakes are soft, tender, and have that classic red velvet texture. Whether you’re a seasoned baker or just starting, this recipe is designed to give you consistently perfect results every time.
We encourage you to try this recipe for yourself and experience the magic of these irresistibly delicious cupcakes! If you’ve made them, we’d love to hear your feedback—leave a comment below sharing how they turned out and any tips you’d like to add!
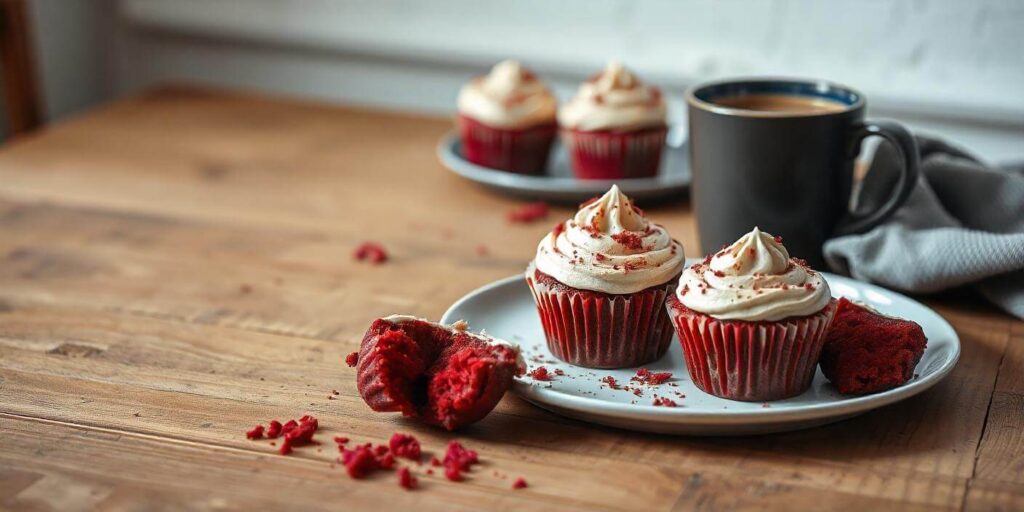
Pairing Ideas:
To elevate your cupcake experience, try pairing them with a warm drink like coffee, a glass of milk, or a mug of hot chocolate—the rich, creamy flavor of the cupcakes will perfectly complement the beverages, creating a cozy treat for any occasion.
So go ahead, get baking, and enjoy these delightful red velvet cupcakes with family and friends! You won’t regret it.
For more recipes, don’t hesitate to check out our blog.
