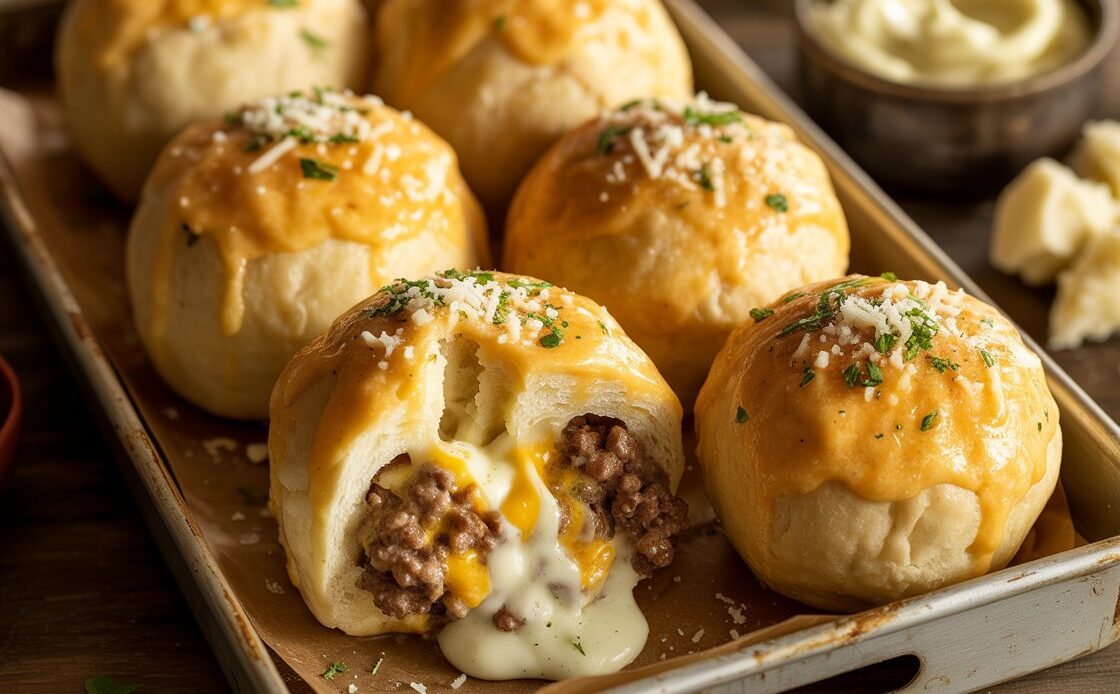
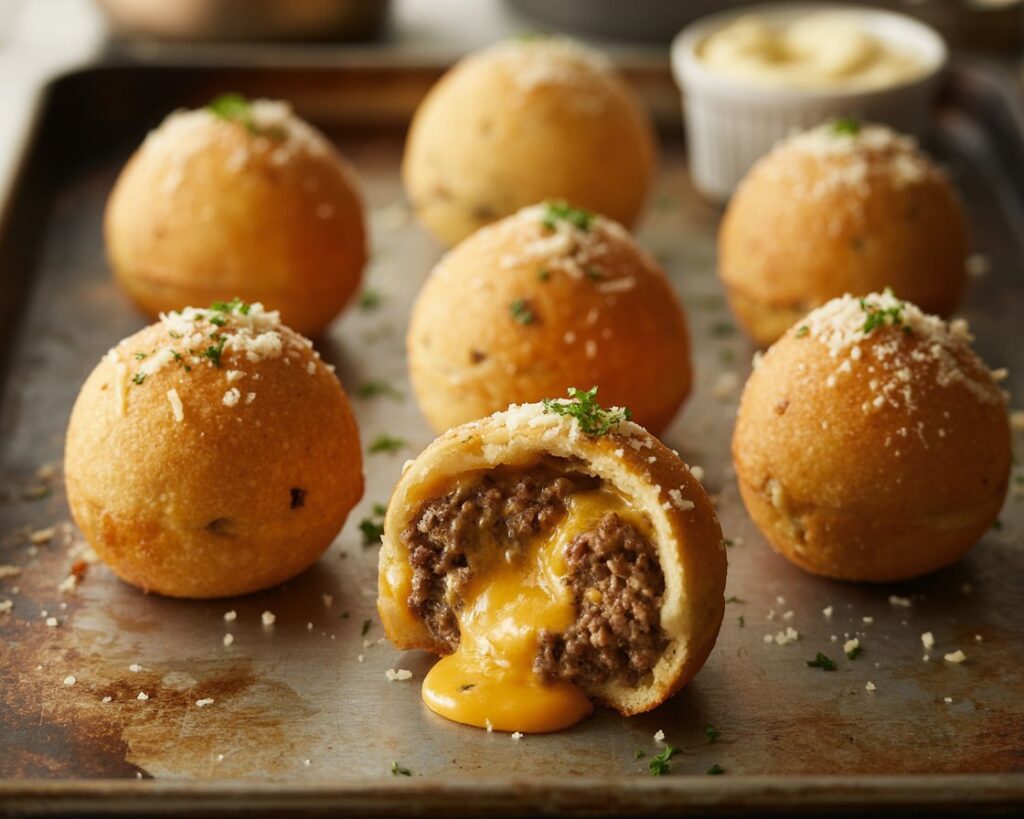
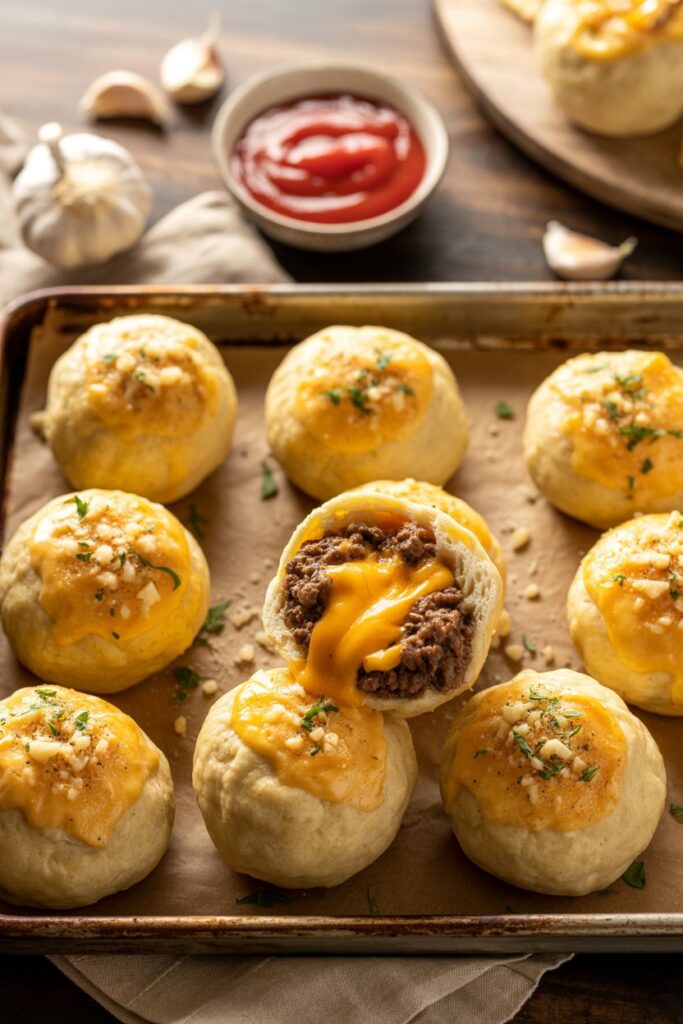
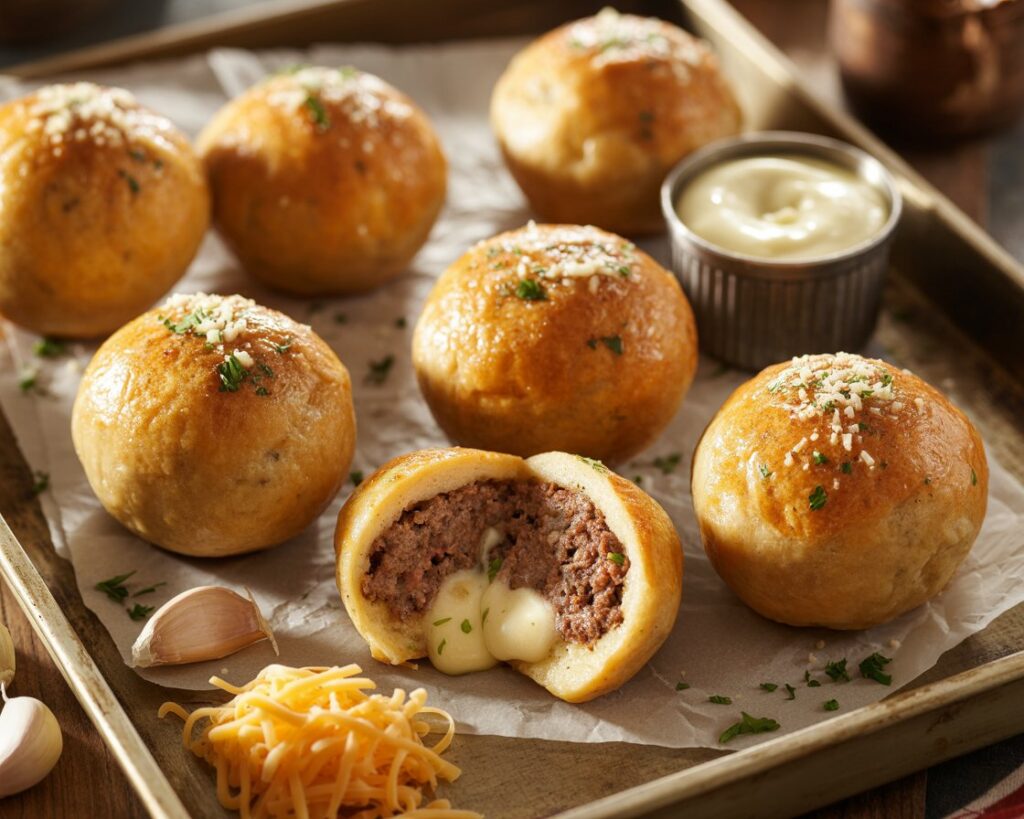
Garlic Parmesan cheeseburger bombs are quickly becoming a favorite snack for food lovers who crave bold flavors wrapped up in a convenient, bite-sized package. Combining the irresistible taste of juicy cheeseburgers with the rich, savory punch of garlic and Parmesan, these cheesy bombs are perfect for everything from quick dinners to crowd-pleasing party appetizers. Whether you’re a seasoned home cook or a beginner, making these delicious bites with simple ingredients is easier than you think — and once you try them, you’ll wonder why you didn’t start sooner!
Why Garlic Parmesan Cheeseburger Bombs Are the Ultimate Crowd-Pleaser
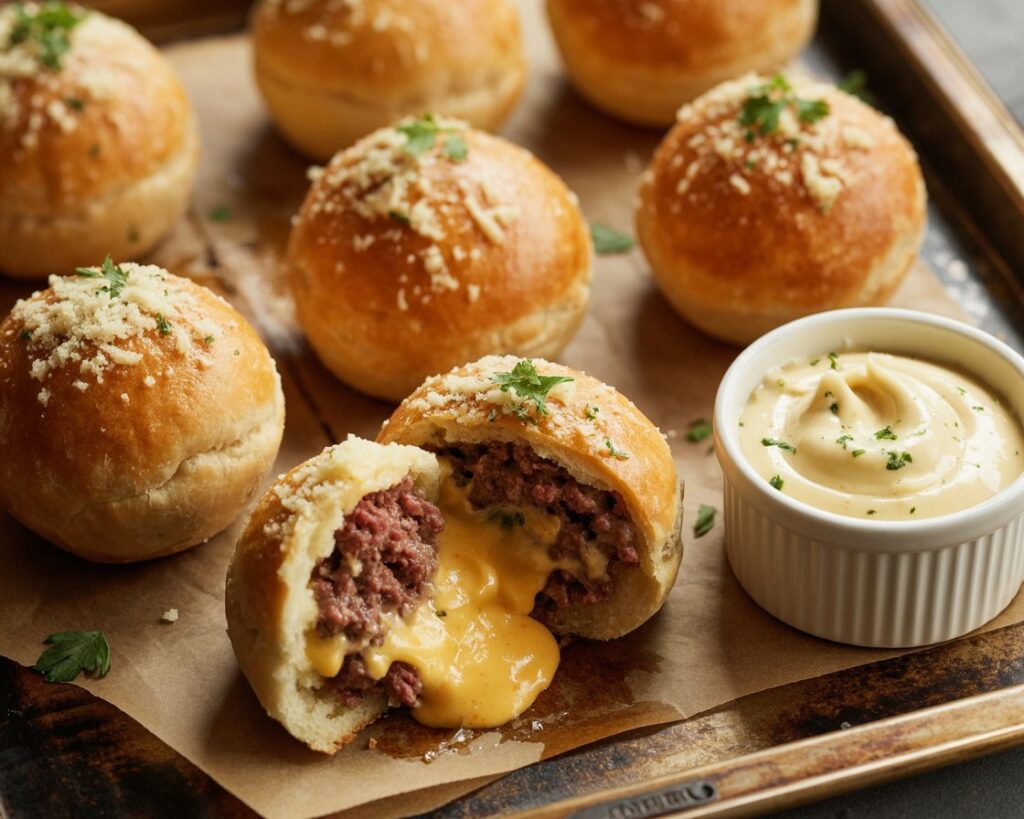
When it comes to snacks and appetizers that satisfy cravings and impress guests, garlic Parmesan cheeseburger bombs hit all the right notes. These bite-sized treats pack the savory goodness of a cheeseburger with the irresistible flavors of garlic and Parmesan cheese, making them more than just your average finger food. Their unique flavor profile, combined with easy preparation and versatility, makes them perfect for any occasion, whether it’s a casual family dinner or a lively game day gathering.
The Flavor Combo That Works Every Time
Garlic Parmesan cheeseburger bombs bring together two bold flavors that perfectly enhance the classic cheeseburger experience. The sharp, nutty taste of Parmesan cheese pairs beautifully with the savory, aromatic punch of garlic, creating a flavor profile that is both familiar and exciting. This combination adds depth and richness to every bite, making these cheeseburger bombs stand out from ordinary snacks.
A fun fact is that the garlic Parmesan flavor originated in Italian-American cuisine and quickly became popular in various snacks like garlic Parmesan wings and fries before making its way into cheeseburger-inspired creations. This fusion of flavors has proven to be irresistible, which explains why these bombs have captured the attention of food enthusiasts everywhere.
Perfect for Any Occasion — From Weeknight Dinners to Game Day Snacks
One of the reasons garlic Parmesan cheeseburger bombs have become a go-to favorite is their incredible versatility. Whether you’re looking for a quick and satisfying weeknight dinner, an easy appetizer for a party, or a delicious snack to enjoy while watching the game, these bombs fit seamlessly into any setting.
| Occasion | Why Garlic Parmesan Cheeseburger Bombs Work Great |
|---|---|
| Party | Easy to share, bite-sized, and packed with flavor — perfect finger food |
| Family Dinner | Quick to prepare and loved by all ages, making mealtime stress-free |
| Tailgating | Portable and hearty, providing satisfying energy and flavor for outdoor fun |
Their compact size and bold flavors make them a crowd-pleaser no matter the event, and the combination of garlic and Parmesan cheese adds a gourmet touch that feels special but requires minimal effort.
Choosing the Right Ingredients for Simple Yet Flavor-Packed Cheeseburger Bombs
The secret to unforgettable garlic Parmesan cheeseburger bombs lies in selecting the best ingredients. While the recipe is straightforward, the choices you make for meat, cheese, and garlic can dramatically impact the final flavor and texture. Let’s break down these key components so you can craft bombs bursting with flavor using simple ingredients.
Ground Beef vs. Other Meats — What Works Best and Why
Ground beef is the classic choice for cheeseburger bombs thanks to its rich flavor and juicy texture. However, other options like ground turkey, chicken, or even plant-based alternatives can be used depending on your preferences or dietary needs.
- Ground Beef: Offers a robust, beefy flavor with a juicy bite. Opt for 80/20 lean-to-fat ratio for the best balance between taste and moisture.
- Ground Turkey/Chicken: Leaner and lighter, these meats yield a milder flavor but can dry out if overcooked. Adding a bit of olive oil or grated cheese can help keep moisture.
- Plant-Based Meat: Perfect for vegetarians or those looking to reduce red meat consumption. Look for varieties that mimic beef texture and flavor for the closest experience.
When cooking, remember that ground beef benefits from medium-high heat for caramelization, while leaner meats need careful attention to avoid dryness.
Cheese Choices That Make or Break Your Cheeseburger Bombs
Cheese is the heart of cheeseburger bombs, and picking the right kind affects everything from taste to how well your bombs hold together. Here’s a quick comparison of popular cheeses used in these bites:
| Cheese | Melting Point | Flavor Intensity | Texture | Best Use in Cheeseburger Bombs |
|---|---|---|---|---|
| Parmesan | High (around 130°C) | Sharp, nutty | Firm, granular | Adds savory, umami flavor and a bit of texture |
| Cheddar | Medium (around 120°C) | Bold, tangy | Smooth, creamy | Classic cheeseburger taste with rich melt |
| Mozzarella | Low (around 100°C) | Mild, milky | Soft, stretchy | Great for gooey, melty center |
Parmesan adds that signature bite and complexity, but it melts less than cheddar or mozzarella. Combining cheeses can provide the perfect balance of flavor and meltability.
Garlic: Fresh, Powdered, or Minced — Picking Your Weapon of Flavor
Garlic is essential in garlic Parmesan cheeseburger bombs, but the form you use will affect both taste and prep time:
- Fresh Garlic: Offers the most vibrant, pungent flavor but requires peeling and mincing. Adds a sharp bite and aroma that stands out.
- Powdered Garlic: Convenient and evenly distributed flavor, but milder and less complex. Great for quick seasoning.
- Minced Garlic (Jarred): A middle ground — easy to use with more fresh garlic flavor than powder but less prep work.
Choosing between these depends on your time and taste preference. For the most authentic garlic punch, fresh minced is unbeatable.
Tips and Tricks for Making the Best Garlic Parmesan Cheeseburger Bombs

Mastering garlic Parmesan cheeseburger bombs is all about getting the details right—from the crispy, golden crust to the ooey-gooey filling inside. With a few simple tips and tricks, you can elevate your bombs from good to unforgettable every time you make them.
How to Get That Perfect Crispy Outside with Gooey Inside
Achieving the ideal contrast between a crispy exterior and a melty, flavorful center starts with the dough and baking technique. Here’s what works best:
- Use refrigerated biscuit dough or homemade dough with a slightly higher fat content to ensure browning and crispness.
- Preheat your oven fully to about 375°F (190°C) — this temperature crisps the outside without drying out the filling.
- Bake the bombs on a parchment-lined baking sheet spaced apart to allow even heat circulation.
- Keep an eye on the bombs during the last few minutes of baking; pulling them out as soon as the crust turns golden helps keep the center soft and gooey.
Timing is everything—usually 15 to 18 minutes does the trick depending on your oven.
Customizing Your Cheeseburger Bombs for Different Taste Buds
One of the best parts of garlic Parmesan cheeseburger bombs is how easily they adapt to different flavor preferences. Whether you want to add some smoky bacon, tangy pickles, or a spicy kick, there’s a simple way to tailor these snacks to suit any palate.
| Add-On | Flavor Profile | Why It Works |
|---|---|---|
| Bacon | Smoky, salty | Adds crunch and a savory depth |
| Pickles | Tangy, slightly sweet | Provides a refreshing contrast |
| Jalapeños | Spicy, bright | Adds heat and a flavor pop |
| BBQ Sauce | Sweet, smoky | Complements the garlic Parmesan richness |
| Caramelized Onions | Sweet, savory | Adds complexity and a subtle sweetness |
Feel free to mix and match add-ons or create your own signature bombs by layering your favorite flavors.
Storing and Reheating Without Losing Flavor or Texture
To enjoy your cheeseburger bombs later without compromising taste or texture, follow these storage tips:
- Freezing: Wrap cooled bombs tightly in plastic wrap and store in an airtight container or freezer bag for up to 2 months.
- Thawing: Transfer frozen bombs to the refrigerator overnight for best results.
- Reheating: Warm bombs in a preheated oven at 350°F (175°C) for 10-12 minutes to revive the crispy crust and melt the cheese inside. Avoid microwaving, which can make the dough soggy.
These simple steps keep your bombs tasting fresh, crispy, and delicious every time.
Creative Serving Ideas and Pairings for Your Cheeseburger Bombs

Elevate your garlic Parmesan cheeseburger bombs experience by pairing them with delicious dips and complementary sides. Thoughtful pairings can turn these tasty bites into a full meal or an irresistible snack platter that wows every time.
Dips and Sauces That Take These Bites to the Next Level
Dips add an extra layer of flavor and texture that perfectly complement the rich, savory cheeseburger bombs. Here are some favorites to try:
- Garlic Aioli: Creamy with a mellow garlic punch, it enhances the Parmesan flavor without overpowering.
- Spicy Ketchup: Classic ketchup with a twist of heat, perfect for those who like a little kick with their cheeseburger bombs.
- Ranch Dressing: Cool and tangy, ranch provides a refreshing contrast to the warm, cheesy filling.
Feel free to experiment with mixing these or adding herbs like chives or smoked paprika for personalized flair.
Side Dishes That Complement Garlic Parmesan Cheeseburger Bombs
Choosing the right side can balance your meal and keep it exciting. Here are some popular side dishes and why they work so well:
| Side Dish | Quick Prep Time | Flavor Notes | Why It Works |
|---|---|---|---|
| Fresh Garden Salad | 5-10 minutes | Light, crisp, refreshing | Balances richness and adds freshness |
| Crispy Fries | 15-20 minutes | Salty, crunchy | Classic pairing, textural contrast |
| Veggie Sticks | 5-10 minutes | Crunchy, cool, slightly sweet | Healthy crunch, balances heaviness |
These sides provide options whether you want something light or indulgent alongside your bombs.
Frequently Asked Questions About Garlic Parmesan Cheeseburger Bombs
Curious about making garlic Parmesan cheeseburger bombs? Below are some of the most common questions answered to help you get the best results and customize your experience.
Can I Make These Ahead of Time?
Absolutely! These cheeseburger bombs can be prepared ahead and baked fresh when you’re ready to serve. Assemble the bombs and store them in the refrigerator for up to 24 hours before baking. For longer storage, freeze the unbaked bombs in a single layer on a baking sheet, then transfer them to a freezer bag. When ready to bake, thaw overnight in the fridge and follow the baking instructions as usual.
Are There Any Gluten-Free or Low-Carb Alternatives?
Yes! For a gluten-free option, use gluten-free biscuit dough or wrap the filling in large lettuce leaves or gluten-free tortillas to create a similar handheld experience. For low-carb versions, consider using almond flour-based dough or cauliflower crusts. Keep in mind, texture and flavor may vary slightly, but you can still enjoy the delicious garlic Parmesan cheeseburger flavor.
What’s the Best Way to Adjust for Larger or Smaller Batches?
Scaling the recipe is straightforward. Simply multiply or divide the ingredient quantities to match your desired number of servings. Keep baking times roughly the same, but monitor closely as smaller bombs may bake faster and larger ones may require a minute or two longer. Using a consistent size helps maintain even cooking and gooey centers.
Why Garlic Parmesan Cheeseburger Bombs Should Be Your Next Recipe Adventure
Garlic Parmesan cheeseburger bombs are more than just a tasty snack—they’re a versatile, crowd-pleasing treat perfect for any occasion. With simple ingredients and endless customization options, they offer a delicious way to satisfy cravings and impress guests alike. Whether you’re serving them up for game day, a family dinner, or a casual get-together, these bombs are sure to become a fast favorite.
For more creative and complementary ideas, check out this fantastic Loaded Potato Skins recipe on FeastRecipe.com — it pairs perfectly with your cheeseburger bombs for a hearty and satisfying meal.
Ready to make your kitchen the ultimate flavor zone? Give these bombs a try and watch everyone ask for seconds!
