
There’s something magical about biting into a warm, fluffy doughnut – the soft, airy texture combined with a touch of sweetness makes it irresistible. If you’ve ever wondered how to achieve that perfect doughnut at home, you’re in the right place. This fluffy doughnut recipe will not only guide you through the process of making the lightest, most tender doughnuts from scratch, but it will also provide tips on glazes, frying techniques, and creative flavor combinations to make your homemade doughnuts even more delightful. Get ready to master the art of doughnuts that are as fun to make as they are to eat!
The Secret Behind Fluffy, Melt-In-Your-Mouth Doughnuts
Making a fluffy doughnut is an art. The texture can make or break the experience. A doughnut that’s light and airy has a delicate bite that melts in your mouth. Dense doughnuts, on the other hand, feel heavy and lack that sought-after softness. Achieving the perfect fluffiness is all about understanding the science behind the dough.
Why Doughnuts Should Be Fluffy (Not Dense)
Fluffy doughnuts are all about texture. When you bite into them, they should have a light, pillowy quality that dissolves effortlessly. Dense doughnuts are often heavy and overly chewy, which can leave a feeling of fullness without the satisfying lightness. The key to fluffiness lies in the dough’s ability to rise properly, which is largely driven by yeast. Yeast creates air pockets as it ferments, making the dough rise and expand. These pockets result in a lighter texture, allowing the doughnut to achieve that melt-in-your-mouth experience.
Key Ingredients That Make Doughnuts Extra Fluffy
To create the perfect fluffy doughnut, the right ingredients are crucial. Yeast is one of the most important elements, as it’s responsible for the dough’s rise and lightness. Flour plays a significant role, too. Bread flour, for instance, has a higher protein content, which creates more gluten, contributing to a chewier texture. All-purpose flour, however, is better for a softer, fluffier result. Eggs help enrich the dough, giving it structure and richness. Combining these ingredients in the right proportions is essential for achieving the ideal texture.
Table idea: Comparison of different types of flour and how they affect doughnut texture (e.g., bread flour vs. all-purpose flour).
Pro Tip: The Role of Resting Dough in Achieving the Perfect Rise
Resting the dough is just as important as the mixing. After you’ve combined all your ingredients, the dough needs time to rise. This resting period allows the yeast to do its job, creating those all-important air pockets. If you rush this step, the dough won’t have the time it needs to expand fully, resulting in a less fluffy doughnut. Resting also allows the gluten to relax, giving the dough a smoother texture. Be patient and let the dough rest until it has doubled in size—this will ensure you get that perfect rise and achieve that melt-in-your-mouth softness.
Mastering the Art of Doughnut Glaze (And Why It Makes All the Difference)
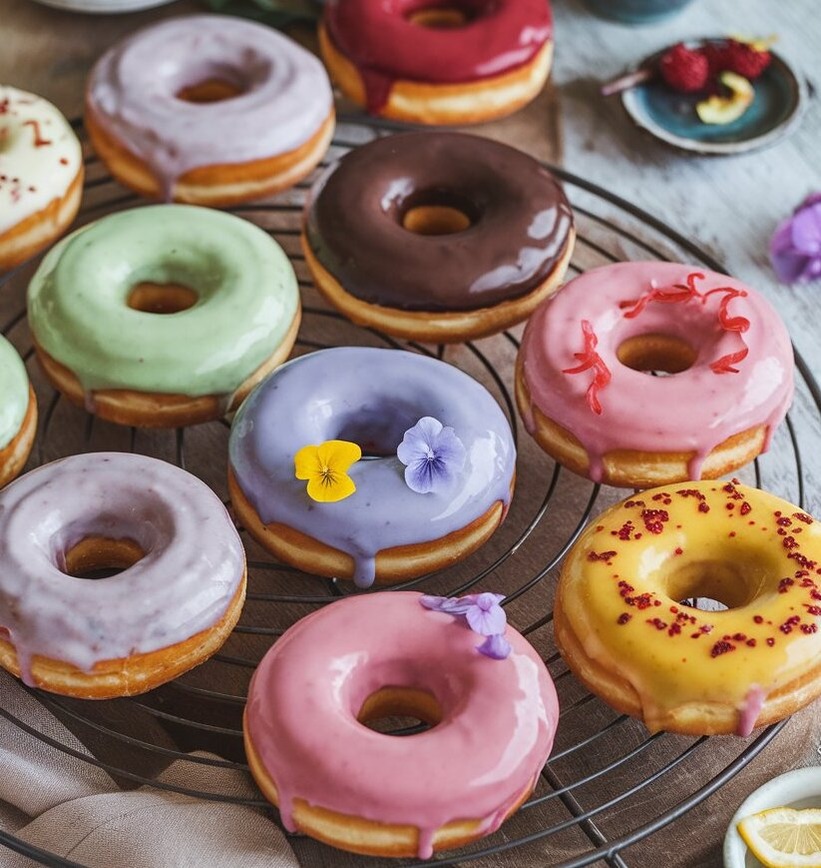
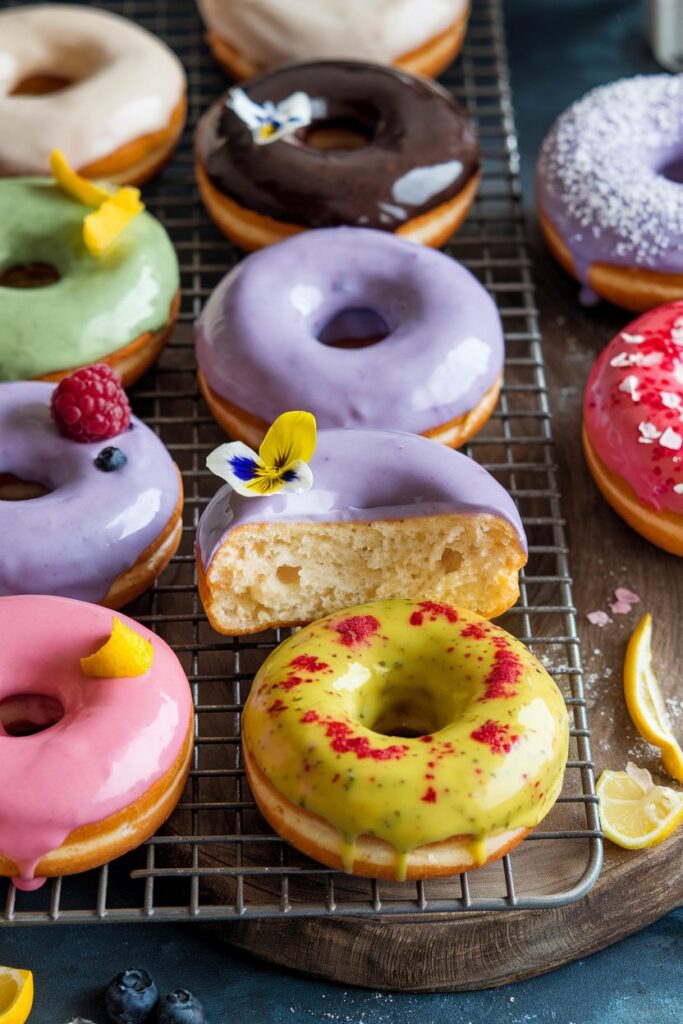
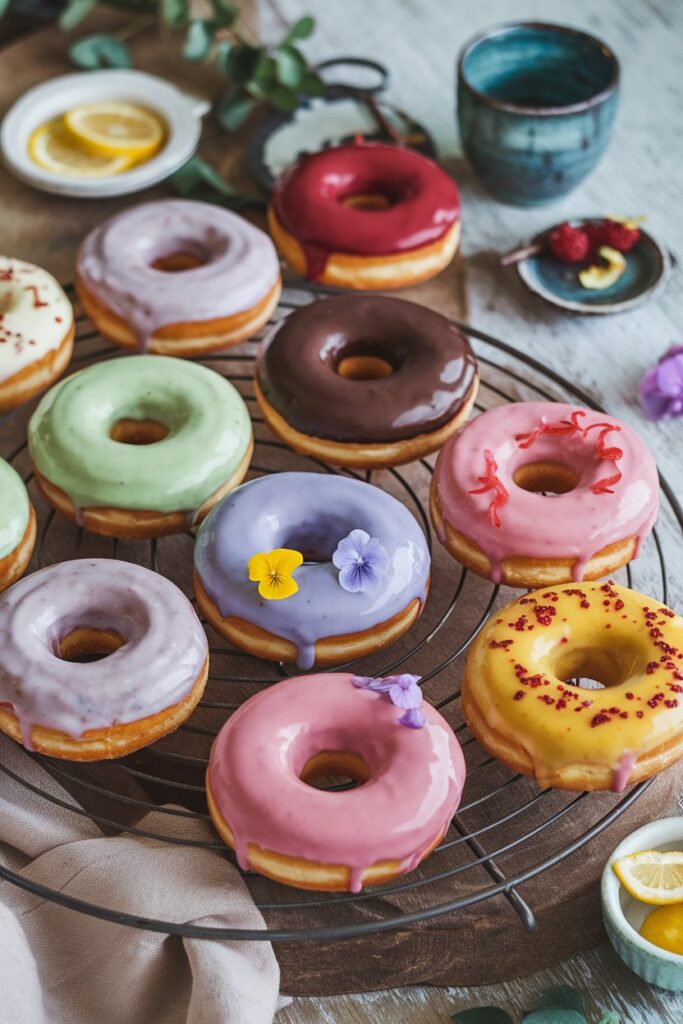
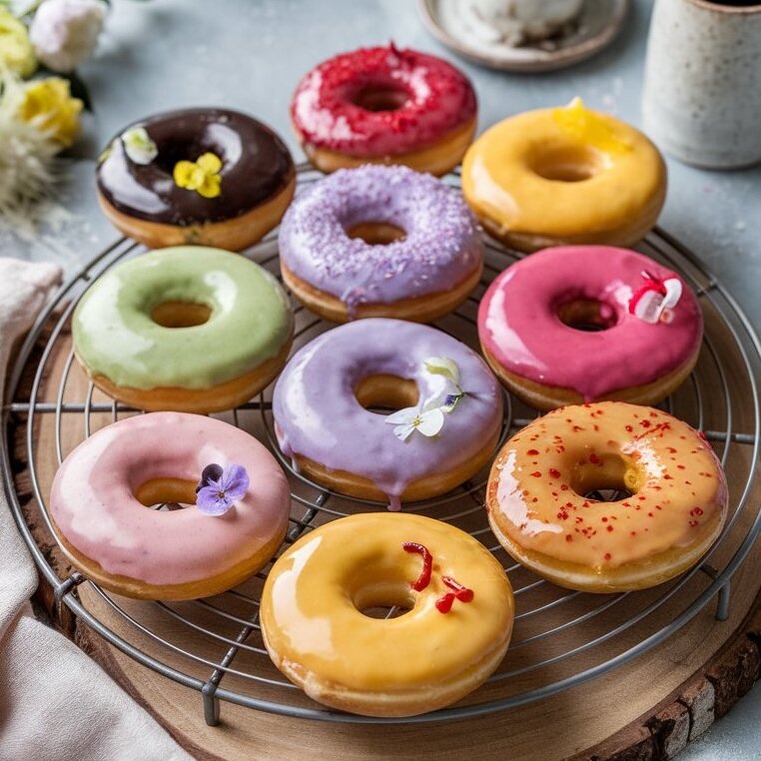
A glaze can completely transform your doughnut. It adds flavor, texture, and that beautiful glossy finish we all crave. From simple classics to wild inventions, your glaze is where creativity shines.
The Most Popular Glaze Types to Elevate Your Doughnuts
Vanilla glaze is a go-to for its simple, sweet flavor and shiny finish. It’s a classic that pairs well with nearly any doughnut. Chocolate glaze is richer and deeper in taste, offering a more indulgent bite. Maple glaze brings a warm, comforting flavor, especially great in colder seasons.
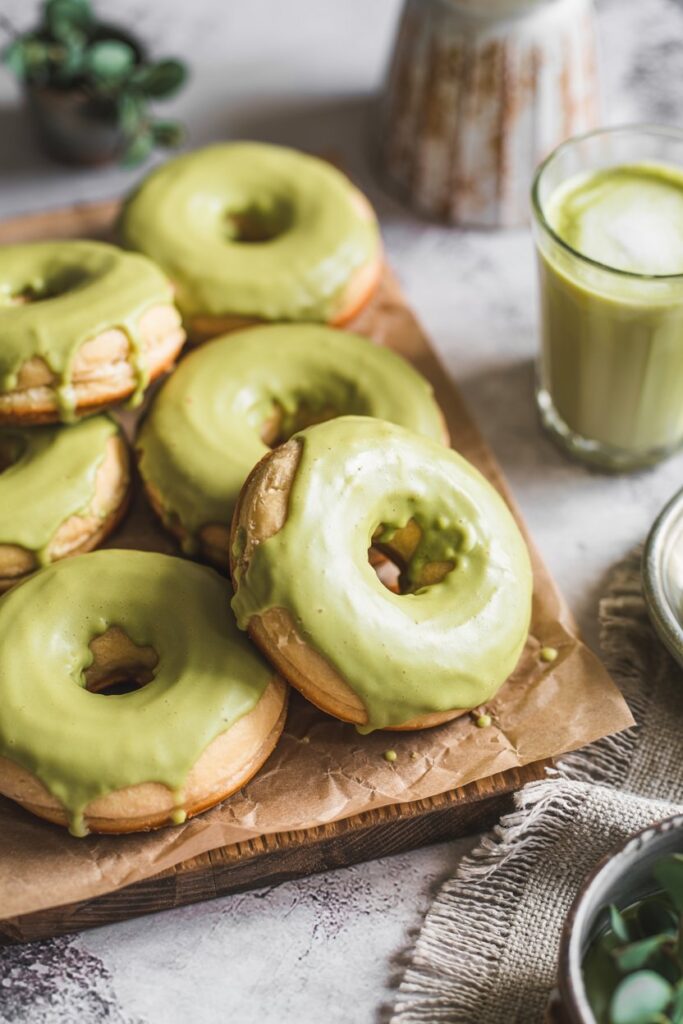
For something more adventurous, try matcha glaze for a hint of earthiness. Lemon glaze adds zing and freshness, while coffee glaze brings a grown-up twist. You can even infuse your glazes with herbs, floral notes, or fruit reductions for a gourmet upgrade.
Tips for Getting That Perfect, Smooth Glaze Every Time
Start with sifted powdered sugar to avoid lumps. Add your liquid—milk, water, or flavor extracts—slowly while whisking. The consistency should coat a spoon but still run smoothly. If it’s too thick, add more liquid one teaspoon at a time. Too runny? Add more sugar.
Apply the glaze when doughnuts are slightly warm, not hot. This helps it set with a smooth, glossy finish without melting off. Use a dipping method for full coverage or a spoon for drizzle designs. Always let them sit on a cooling rack to dry evenly.
Beyond Glaze: Creative Coatings to Experiment With
Not all coatings need to be a glaze. Cinnamon sugar is a nostalgic favorite that adds crunch and warmth. Powdered sugar works best on cooled doughnuts and adds a soft, classic sweetness. Try cocoa powder mixed with sugar for a chocolaty dusting.
Crushed freeze-dried fruit, shredded coconut, or sprinkles can add color and texture. For a savory-sweet twist, crushed nuts, bacon bits, or pretzel crumbs make surprising yet delightful additions. These options let you customize your doughnuts with texture and visual flair.
The Doughnut Frying Process: How to Get It Just Right
Even with the perfect dough, frying can make or break your doughnuts. It’s where golden color, crisp edges, and that melt-in-your-mouth softness come to life. Mastering the frying process is key to doughnut perfection.
What’s the Ideal Oil Temperature for Frying Doughnuts?
Temperature control is everything. If the oil is too hot, the outside browns too fast while the inside stays raw. If it’s too cool, your doughnuts absorb too much oil and turn greasy. The sweet spot is between 350°F and 375°F (175°C to 190°C).
Use a thermometer to track the oil throughout the process. Don’t rely on bubbles or instinct. Also, avoid crowding the pan—adding too many doughnuts at once can drop the temperature fast. Let the oil return to the right temperature between batches for consistent results.
How Long Should You Fry Doughnuts for That Perfect Golden Brown?
Timing matters just as much as temperature. Most doughnuts need about 1 to 2 minutes per side. Flip them once when the first side turns golden. Don’t rush it—undercooked doughnuts can be doughy, while overcooked ones turn dry and hard.
Use a slotted spoon or spider strainer to turn and remove them gently. Let excess oil drain on a wire rack or paper towel-lined tray. This keeps the texture crisp without becoming soggy. Bonus tip: always test your first doughnut—it sets the tone for the rest.
Frying vs. Baking: Which is Better for Fluffy Doughnuts?
Frying wins in terms of texture and flavor. The hot oil gives doughnuts a crispy outside and soft, airy inside. It creates that signature golden crust and slight crunch when you bite in. Baking, on the other hand, skips the oil and offers a lighter, less greasy option.
Baked doughnuts are great for a healthier alternative, but they tend to be more cake-like than fluffy. They’re good for quick snacks or breakfast, but if you want classic, pillow-soft doughnuts that taste like they came from a bakery—frying is the way to go.
Troubleshooting Common Fluffy Doughnut Recipe Problems
Even the most experienced bakers run into issues with homemade doughnuts. The good news? Most problems are easy to fix once you know what to look for. Let’s break down the usual culprits behind less-than-fluffy doughnuts—and how to avoid them.
Why Are My Doughnuts Too Dense? Here’s What Went Wrong
Dense doughnuts are usually a sign of dough that’s been overworked or yeast that didn’t activate properly. If the yeast is expired or wasn’t proofed in warm water, the dough won’t rise as expected. Always check the date on your yeast and make sure the water is around 105°F to 115°F (40°C to 46°C)—any hotter can kill it.
Another common cause is over-mixing. Stirring the dough too much can develop too much gluten, making the final product tough and chewy instead of soft and airy. Mix until just combined, then stop. Let the dough rest and rise in a warm, draft-free space to encourage fluffiness.
Doughnuts Not Rising? Here’s How to Fix It
If your doughnuts aren’t rising, your yeast might be dead—or your environment might not be warm enough. Make sure your dough is resting somewhere between 75°F and 85°F (24°C to 29°C). A slightly warm oven (turned off) or a sunny countertop works great.
Also, don’t rush the process. Let the dough double in size before shaping. If the rise is too short, the doughnuts will lack volume and softness. If you’re short on time, you can try a “proofing box” setup with a bowl of hot water under your dough tray to create a warm microclimate.
The Mystery of Doughnut Holes: How to Get Them Just Right
Doughnut holes aren’t just cute—they’re a great way to test your dough. But getting them just right can be tricky. If they come out too doughy inside, your oil temperature might be too high. If they’re flat and dry, the dough may not have risen long enough.
Shape your holes evenly, and make sure they’re proofed just like your full doughnuts. Want to skip the holes? Use a filled-doughnut cutter or skip the center punch. For fun, try turning doughnut holes into mini treats—coat them in cinnamon sugar or dip them in chocolate glaze for an instant hit.
Unique Flavors and Fun Variations to Try with Your Fluffy Doughnut Recipe
Once you’ve mastered the basics, it’s time to have fun. Doughnuts are the perfect canvas for creativity—both sweet and savory. Whether you want to impress guests or just shake things up, these ideas will spark your imagination.
Sweet, Savory, and Beyond: Unusual Doughnut Flavors to Try
Vanilla and chocolate are classic, but why stop there? For a twist, try matcha glaze for a subtle, earthy green flavor. Lavender glaze offers a floral aroma that feels gourmet and refreshing. For fruit lovers, experiment with glazes made from berry reductions, citrus zest, or even pineapple chili.
Savory doughnuts are having a moment, too. Bacon maple doughnuts combine salty and sweet for an unforgettable bite. Try cheddar jalapeño for a spicy twist, or even a garlic-parmesan doughnut for an appetizer-like version. Don’t be afraid to break the rules—some of the best combinations are the most unexpected.
Doughnut Pairings: The Best Drinks and Sides for Your Homemade Treats
Pairing your fluffy doughnuts with the right drink or side dish can turn snack time into a full experience. Coffee and doughnuts are a classic duo, especially if the brew has rich, bold notes that balance out sweetness. Milk is great with chocolate or cinnamon-flavored doughnuts. Chai tea, matcha lattes, or fruit-infused teas pair well with fruity or floral variations.
For a brunch spread, serve doughnuts alongside fresh fruit, scrambled eggs, or a light yogurt parfait. Mini doughnuts also make fun additions to dessert boards, brunch platters, or party tables. The key is to balance flavors so nothing overwhelms the delicate texture of your doughnuts.
The Ultimate Doughnut Challenge: Create Your Dream Doughnut Flavor
Here’s your moment to shine. Mix and match glazes, fillings, and toppings to invent a signature flavor. Start with a base doughnut—classic, chocolate, or spiced—and pick one glaze and one topping that contrast or enhance it. Think lemon glaze with crushed pistachios, or espresso glaze with cocoa nibs.
Encourage family or friends to create their own. Host a “Build Your Own Doughnut” brunch or challenge followers on social media to show off their custom creations. This turns your doughnut-making into an interactive and joyful event.
Final Thoughts: Bring This Fluffy Doughnut Recipe to Life in Your Kitchen
With the right techniques and a dash of creativity, this fluffy doughnut recipe can become your next favorite homemade treat. Whether you stick to the classics or go bold with unique flavors, there’s nothing like a freshly made, golden, melt-in-your-mouth doughnut.
Pair your doughnuts with something refreshing like this Quick Cottage Cheese Wrap Recipe for a High-Protein Meal from our blog—perfect for a balanced brunch spread.
