There’s nothing quite like the taste of homemade ice cream—fresh, creamy, and made exactly to your liking. With a Cuisinart Ice Cream Maker, crafting your favorite frozen treats at home has never been easier. Whether you’re craving classic vanilla, rich chocolate, or a refreshing fruit-based sorbet, this versatile machine lets you create restaurant-quality ice cream in the comfort of your own kitchen.
But why choose homemade ice cream over store-bought options? For starters, when you make ice cream at home, you control the ingredients—no artificial preservatives, unnecessary additives, or excessive sugar. You can also customize flavors to suit your taste preferences and dietary needs, whether that means using organic dairy, incorporating fresh fruit, or experimenting with dairy-free alternatives like coconut or almond milk. Plus, with a Cuisinart Ice Cream Maker, the process is incredibly simple: just prepare your base, let the machine do the churning, and enjoy freshly made ice cream in no time.
What You’ll Learn in This Guide
In this post, we’ll cover everything you need to know about making the best ice cream at home with a Cuisinart Ice Cream Maker, including:
- Why a Cuisinart Ice Cream Maker is a great choice for homemade frozen desserts.
- Essential ingredients and tips for achieving the perfect texture and flavor.
- A step-by-step guide to making ice cream, from preparing your base to churning and storing.
- Delicious and easy Cuisinart Ice Cream Maker recipes you can try today.
- Expert tips and troubleshooting advice to ensure your ice cream turns out smooth and creamy every time.
By the end of this guide, you’ll be fully equipped to create incredible homemade ice cream that rivals your favorite scoop shop. Let’s get started!
Why Choose a Cuisinart Ice Cream Maker for Homemade Ice Cream?
Investing in a Cuisinart Ice Cream Maker is one of the best ways to elevate your homemade ice cream experience. Unlike no-churn methods that require manual mixing and extended freezing times, a Cuisinart machine automates the process, delivering smooth, creamy results every time. Whether you’re a beginner looking for a simple model or an ice cream enthusiast wanting professional-quality results, Cuisinart offers reliable and efficient ice cream makers to suit your needs.
Features of Popular Cuisinart Ice Cream Maker Models
Cuisinart has a range of ice cream makers, but two of the most popular models are the Cuisinart ICE-21 and Cuisinart ICE-100. Here’s how they compare:
Cuisinart ICE-21 vs. Cuisinart ICE-100
| Feature | Cuisinart ICE-21 | Cuisinart ICE-100 |
|---|---|---|
| Type | Freezer bowl model | Compressor-based model |
| Capacity | 1.5 quarts | 1.5 quarts |
| Churning Time | 15–20 minutes | 40–50 minutes |
| Pre-Freezing Required? | Yes (bowl must freeze for 12–24 hours) | No (built-in freezer) |
| Best For | Beginners, occasional use | Frequent use, premium results |
| Price Range | Budget-friendly | Higher-end |
- Cuisinart ICE-21: This budget-friendly model requires you to freeze the bowl beforehand but churns ice cream quickly. It’s ideal for casual users.
- Cuisinart ICE-100: A compressor-based machine that doesn’t require pre-freezing, allowing you to make multiple batches back-to-back. It’s perfect for serious home ice cream makers.
Soft Serve vs. Traditional Ice Cream Makers
Cuisinart also offers soft serve ice cream makers like the Cuisinart ICE-45, which dispenses ice cream directly from the machine, similar to what you’d find at an ice cream shop. Traditional ice cream makers, like the ICE-21 and ICE-100, produce firmer ice cream, which can be scooped and stored for later. Your choice depends on whether you prefer soft serve right away or a firmer texture after freezing.
Benefits of Using a Cuisinart Ice Cream Maker
Using a Cuisinart Ice Cream Maker offers several advantages over store-bought ice cream and other homemade methods:
1. Consistent Churning Process for a Smooth Texture
- The churning paddle in Cuisinart machines continuously stirs the mixture while it freezes, breaking up ice crystals and incorporating air for a smooth, creamy consistency.
- This results in better texture compared to no-churn recipes, which can sometimes turn out icy or dense.
2. Easy-to-Use Freezing Bowl and Simple Setup
- With models like the ICE-21, all you need to do is freeze the bowl, add ingredients, and let the machine churn—no complicated steps required.
- Compressor-based models like the ICE-100 eliminate pre-freezing altogether, making the process even easier.
3. Versatility: Works for Ice Cream, Gelato, Sorbet, and Frozen Yogurt
- A Cuisinart machine isn’t just for traditional ice cream. You can also make:
- Gelato (lower air incorporation for a denser texture)
- Sorbet (fruit-based frozen desserts with no dairy)
- Frozen yogurt (a tangy, lighter alternative to ice cream)
- This versatility allows you to experiment with different frozen desserts beyond classic ice cream.
Churned vs. No-Churn Ice Cream – What’s the Difference?
If you’ve seen no-churn ice cream recipes, you may wonder how they compare to ice cream made in a Cuisinart Ice Cream Maker. While both methods can produce delicious results, there are key differences in texture, consistency, and overall quality.
Why Churned Ice Cream Creates a Better Texture
- Churned ice cream, made in machines like the Cuisinart ICE-21 or ICE-100, is constantly stirred while freezing, preventing large ice crystals from forming.
- This process incorporates air, giving ice cream a light, smooth, and creamy consistency.
- Churned ice cream is closer to what you’d buy at an ice cream shop in terms of texture and flavor balance.
When to Use No-Churn Methods Instead
- No-churn ice cream typically combines sweetened condensed milk and whipped cream to create a creamy texture without a machine.
- It’s a great alternative if you don’t have an ice cream maker, but it can sometimes result in a denser, less airy texture.
- Best for: Quick, small-batch ice cream recipes when you don’t have time to churn.
Final Thoughts
A Cuisinart Ice Cream Maker is a fantastic investment for anyone who loves making homemade ice cream. Whether you opt for the affordable ICE-21 or the premium ICE-100, these machines offer consistent churning, an easy setup, and versatility for different frozen treats. Compared to no-churn methods, Cuisinart machines deliver a superior texture and professional-quality results, making them the ideal choice for serious home ice cream makers.
Look at this
Check out these recipes
Essential Ingredients for the Best Cuisinart Ice Cream Maker Recipes
To make smooth, creamy, and flavorful ice cream with your Cuisinart Ice Cream Maker, selecting the right ingredients is key. Whether you prefer classic dairy-based ice cream, fun mix-ins, or dairy-free alternatives, using high-quality ingredients will enhance the final product. Below, we’ll break down the essential ingredients for a perfect homemade ice cream base, delicious flavor additions, and the best plant-based substitutes for vegan ice cream.
Basic Ice Cream Base Ingredients
A great ice cream starts with a simple, well-balanced base. The traditional custard-style ice cream base consists of five key ingredients:
1. Heavy Cream
- The high fat content (at least 36%) in heavy cream creates a rich, smooth texture.
- It adds creaminess and prevents ice crystals from forming during freezing.
2. Whole Milk
- Balances out the heavy cream to prevent ice cream from becoming too dense.
- Whole milk (at least 3.25% fat) contributes to a soft, scoopable texture.
3. Egg Yolks (for Custard-Style Ice Cream)
- Egg yolks act as a natural emulsifier, creating a silkier consistency.
- They give the ice cream a luxurious, creamy texture found in premium brands.
4. Sugar
- Sweetens the ice cream while also affecting the freezing point, keeping the mixture soft and scoopable.
- White sugar is the most common choice, but you can also use:
- Brown sugar for a deeper, caramel-like flavor.
- Honey or maple syrup for natural sweetness.
5. Vanilla Extract
- Even when making other flavors, vanilla extract enhances the overall taste.
- Use pure vanilla extract instead of artificial vanilla for the best results.
Optional: Corn Syrup or Sweetened Condensed Milk
- Some recipes use corn syrup to prevent ice crystals and create a softer texture.
- Sweetened condensed milk is often used in no-churn ice cream recipes but can also be added to churned ice cream for extra creaminess.
Flavor Additions and Mix-Ins
Once you have a solid ice cream base, it’s time to get creative! Flavor additions and mix-ins can take your homemade ice cream to the next level.
1. Chocolate-Based Additions
- Cocoa powder or melted chocolate for deep chocolate flavor.
- Chocolate chips, chunks, or shavings for texture.
- Fudge or chocolate sauce swirls for a rich, marbled effect.
2. Fruit Purees and Extracts
- Strawberry, raspberry, or mango puree for fresh fruit flavors.
- Lemon, peppermint, or almond extracts to enhance specific flavors.
3. Nuts and Crunchy Mix-Ins
- Toasted almonds, pecans, or walnuts add crunch and depth.
- Cookie crumbles (Oreo, graham crackers, shortbread) for extra texture.
4. Caramel and Other Sweet Swirls
- Caramel swirls, dulce de leche, or butterscotch for a gooey texture.
- Peanut butter ribbons for a salty-sweet contrast.
5. Unique Additions for Fun Flavors
- Marshmallows and graham crackers for s’mores ice cream.
- Espresso or cold brew concentrate for coffee-flavored ice cream.
- Cinnamon, nutmeg, or cardamom for a spiced ice cream twist.
Tip: Add mix-ins during the last 5 minutes of churning to prevent them from sinking to the bottom.
Dairy-Free and Vegan Alternatives of Cuisinart Ice Cream Maker Recipes
For those who are vegan, lactose-intolerant, or simply prefer dairy-free options, there are plenty of plant-based substitutes that create rich and creamy ice cream without dairy.
1. Best Dairy-Free Milk Alternatives
- Coconut Milk: The best dairy-free option due to its high fat content, which mimics heavy cream.
- Almond Milk: Lighter than coconut milk but works well in fruit-based ice creams.
- Oat Milk: Naturally sweet and creates a creamy texture without being too heavy.
- Cashew Milk: Similar to coconut milk, but with a mild flavor that blends well with other ingredients.
Tip: Use full-fat canned coconut milk for the creamiest vegan ice cream.
2. Vegan Thickeners & Sweeteners
- Cornstarch, arrowroot powder, or agar-agar help thicken dairy-free bases.
- Maple syrup, agave nectar, or coconut sugar for natural sweetness.
3. Vegan Mix-Ins and Flavors
- Dairy-free chocolate chips for chocolate lovers.
- Nut butters (peanut, almond, cashew) for added creaminess.
- Fresh berries or caramelized bananas for natural sweetness.
Tip: Since dairy-free ice cream freezes harder than traditional ice cream, let it sit at room temperature for 5–10 minutes before scooping.
Final Thoughts
Using the right ingredients in your Cuisinart Ice Cream Maker is the key to creating rich, flavorful, and creamy ice cream at home. Whether you’re making classic vanilla, experimenting with mix-ins, or crafting a dairy-free alternative, understanding your base ingredients will help you achieve the perfect texture every time.
Step-by-Step Guide to Making Ice Cream with a Cuisinart Ice Cream Maker

Making homemade ice cream with a Cuisinart Ice Cream Maker is a fun and easy process. With the right ingredients and a few simple steps, you’ll be able to churn out creamy, rich ice cream that rivals your favorite store-bought brands. Below is a step-by-step guide to help you master the ice cream-making process using your Cuisinart Ice Cream Maker.
Preparing Your Ice Cream Base
The first step in making ice cream is preparing the base. There are two popular types of ice cream bases: custard-style and Philadelphia-style.
1. Classic Custard-Style vs. Philadelphia-Style (Eggless)
- Custard-style ice cream includes egg yolks, which create a smooth, creamy texture. The process involves cooking the base to create a custard before chilling it. This results in richer, denser ice cream.
- Philadelphia-style ice cream, on the other hand, is an eggless base made from cream, milk, sugar, and flavorings. It’s quicker to make since it doesn’t require cooking, and it results in a lighter, smoother ice cream.
2. Mixing and Chilling Before Churning
- Combine your base ingredients in a bowl, ensuring they are well mixed. This will usually include heavy cream, whole milk, sugar, and any flavorings.
- Chill the mixture in the fridge for at least 2–4 hours (overnight is best). This allows the flavors to meld and ensures that the mixture is cold before it hits the Cuisinart machine, which will help the ice cream churn more effectively.
Tip: If you’re making a custard-style base, you’ll need to temper the egg yolks with hot cream and milk to avoid scrambling the eggs. After cooking, cool the custard completely before chilling.
hurning Process for the Perfect Ice Cream
The churning process is where the magic happens. The Cuisinart Ice Cream Maker continuously stirs the mixture while it freezes, creating that smooth, airy texture we love in homemade ice cream.
1. Freezing the Cuisinart Bowl Before Use
- Cuisinart models like the ICE-21 require you to freeze the bowl for 12–24 hours before use. The bowl must be completely frozen to ensure that the ice cream churns properly. If the bowl isn’t frozen enough, the mixture may not freeze as quickly, leading to a less-than-ideal texture.
- Tip: Always store the bowl in the freezer when not in use so it’s ready for your next ice cream-making session.
2. Best Churning Time for Creamy Consistency
- Pour your chilled base into the frozen bowl and turn on the Cuisinart machine.
- Churn the mixture for 15-20 minutes (for the ICE-21) or around 30-50 minutes (for the ICE-100) until it reaches a soft-serve consistency.
- The ice cream will thicken and double in volume as it churns. For a firmer texture, you can let it continue to churn for a few more minutes, but avoid churning too long, as it can become too dense.
Tip: The ice cream should feel thick and creamy but still be easy to scoop. If you want to add any mix-ins (chocolate chips, fruit, nuts), do so during the last 5 minutes of churning to ensure they’re evenly distributed.
Storing and Freezing Your Ice Cream
After churning, the ice cream may be soft and best served immediately (like soft serve). However, if you prefer firmer ice cream or want to store it for later, you’ll need to freeze it.
1. Best Containers for Ice Cream Storage
- For optimal storage, place your ice cream in a sealed, airtight container. Plastic containers with tight-fitting lids work well.
- Metal containers (like loaf pans) help retain cold better, preventing the ice cream from melting too quickly when you take it out of the freezer.
- Use a piece of wax paper or plastic wrap to cover the surface of the ice cream before sealing the container to prevent ice crystals from forming on top.
2. Preventing Freezer Burn
- Freezer burn happens when ice crystals form on the surface of the ice cream, affecting its texture and flavor. To avoid this:
- Ensure that the container is sealed tightly to keep air out.
- If you’re storing the ice cream for a long time, press plastic wrap or parchment paper directly onto the surface of the ice cream before sealing the container.
- If the ice cream hardens too much in the freezer, let it sit at room temperature for 5-10 minutes before scooping.
Tip: Homemade ice cream will stay fresh in the freezer for up to 2–3 weeks, but it’s best enjoyed within the first week for optimal flavor and texture.
Final Thoughts
By following this step-by-step guide, you’ll be able to make delicious, creamy ice cream at home with your Cuisinart Ice Cream Maker. From preparing your base to churning and storing the ice cream, each step plays a crucial role in getting that perfect scoop. So, get creative with your favorite flavors and enjoy the process of crafting your own frozen treats!
Best Cuisinart Ice Cream Maker Recipes to Try at Home
Now that you’ve mastered the process of making ice cream with your Cuisinart Ice Cream Maker, it’s time to get started with some delicious recipes. Whether you’re craving classic vanilla, rich chocolate, refreshing fruit flavors, or dairy-free options, these recipes will give you plenty of inspiration to create your own frozen treats at home. Here are four must-try ice cream recipes that are simple, creamy, and perfect for your Cuisinart machine.
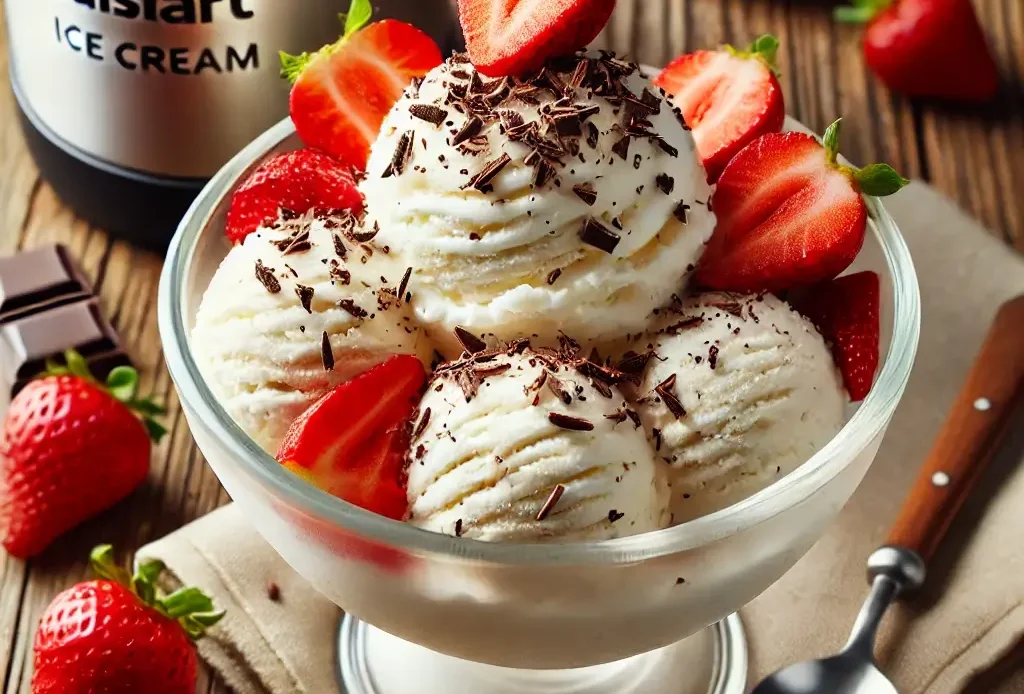
Classic Vanilla Ice Cream Recipe
The classic vanilla ice cream is a timeless favorite and a great starting point for beginners. With just a few simple ingredients, you can make an indulgent and creamy treat that’s perfect on its own or paired with your favorite mix-ins.
Ingredients:
- 1 cup heavy cream
- 1 cup whole milk
- ¾ cup sugar
- 1 tbsp pure vanilla extract
Step-by-Step Method:
- Combine the ingredients in a bowl. Whisk together the heavy cream, whole milk, sugar, and vanilla extract until the sugar is completely dissolved.
- Chill the mixture in the fridge for at least 2 hours to ensure it’s cold before churning.
- Pour the chilled mixture into your frozen Cuisinart bowl and churn for 15-20 minutes, or until it reaches soft-serve consistency.
- For a firmer texture, transfer the ice cream to an airtight container and freeze for 4-6 hours.
Tip: If you prefer an eggless base, this simple Philadelphia-style recipe works perfectly without the need for cooking.
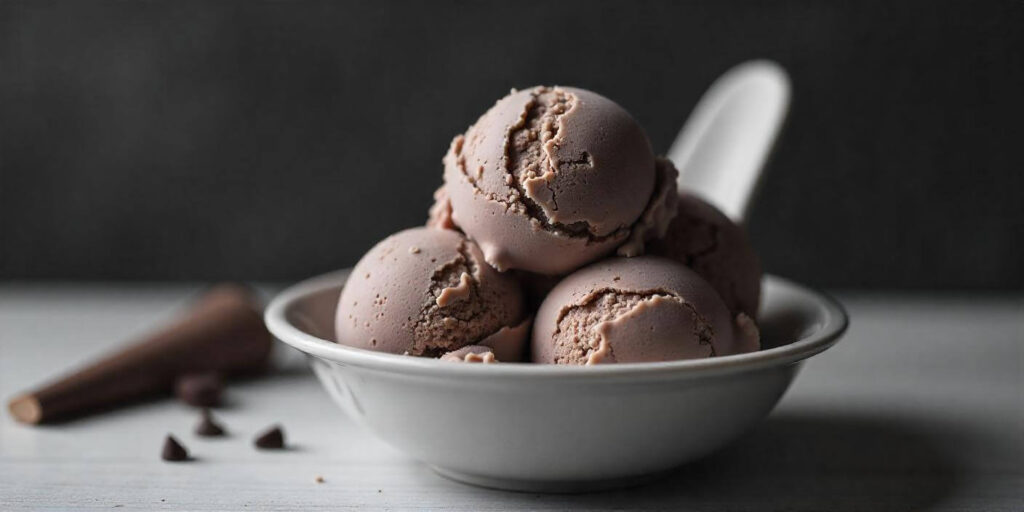
Rich and Creamy Chocolate Ice Cream Recipe
For chocolate lovers, this rich and creamy chocolate ice cream is a dream come true. You can make it using either cocoa powder for a smoother texture or melted chocolate for a richer, fudgier result.
Ingredients (Cocoa Powder Version):
- 1 cup heavy cream
- 1 cup whole milk
- ¾ cup sugar
- ⅓ cup unsweetened cocoa powder
- 1 tsp vanilla extract
Ingredients (Melted Chocolate Version):
- 1 cup heavy cream
- 1 cup whole milk
- ¾ cup sugar
- 4 oz dark chocolate (melted)
- 1 tsp vanilla extract
Step-by-Step Method:
- For the cocoa powder version, whisk together cream, milk, sugar, and cocoa powder until smooth. For the melted chocolate version, melt the chocolate and combine it with the cream and milk.
- Chill the mixture for 2-4 hours to allow the flavors to develop.
- Pour the chilled mixture into the frozen bowl of the Cuisinart Ice Cream Maker and churn for 15-20 minutes.
- For firmer ice cream, transfer it to an airtight container and freeze for 4-6 hours.
Tip: Melted chocolate provides a richer and denser texture, while cocoa powder delivers a smoother, more velvety result.
Fruity and Refreshing Strawberry Ice Cream Recipe
A strawberry ice cream is the perfect treat for a refreshing and fruity dessert. You can use fresh strawberries for a bright, natural flavor or frozen strawberries for a more intense, concentrated taste.
Ingredients:
- 1 cup heavy cream
- 1 cup whole milk
- ¾ cup sugar
- 1 ½ cups fresh or frozen strawberries (pureed)
- 1 tsp vanilla extract
Step-by-Step Method:
- Puree the strawberries in a blender or food processor until smooth. If using fresh strawberries, you may want to mash them slightly before blending.
- In a bowl, combine the heavy cream, whole milk, sugar, and pureed strawberries. Add in the vanilla extract and whisk to combine.
- Chill the mixture in the fridge for at least 2 hours.
- Pour the mixture into your Cuisinart bowl and churn for 15-20 minutes.
- Once churned, transfer the ice cream to an airtight container and freeze for 4-6 hours for a firmer consistency.
Tip: For extra flavor, stir in some chopped fresh strawberries during the last 5 minutes of churning for a chunky texture.
Dairy-Free Coconut Ice Cream Recipe
This dairy-free coconut ice cream is the perfect option for those following vegan or lactose-free diets. Made with coconut milk, it’s naturally creamy and rich, with a delicious coconut flavor that shines through.
Ingredients:
- 2 cans (13.5 oz each) full-fat coconut milk
- ¾ cup sugar (or maple syrup for a vegan alternative)
- 1 tsp vanilla extract
Step-by-Step Method:
- In a bowl, whisk together the coconut milk, sugar, and vanilla extract until the sugar is dissolved.
- Chill the mixture for at least 2 hours in the fridge to ensure it’s cold before churning.
- Pour the mixture into your Cuisinart bowl and churn for 20-25 minutes or until it reaches a soft-serve consistency.
- Transfer the ice cream to an airtight container and freeze for 4-6 hours to firm up.
Tip: For a tropical twist, you can add toasted coconut flakes or pineapple chunks during the last 5 minutes of churning for extra texture and flavor.
Final Thoughts
These four Cuisinart Ice Cream Maker recipes—from classic vanilla to dairy-free coconut—offer a delicious range of flavors that will satisfy any craving. With a bit of practice and the right ingredients, you’ll be able to experiment with new flavors and create endless combinations of creamy, rich ice cream.
Tips and Tricks for Perfect Cuisinart Ice Cream Maker Recipes

Making homemade ice cream with your Cuisinart Ice Cream Maker is a fun process, but there are a few tips and tricks that can take your ice cream-making game to the next level. Whether you’re new to the process or a seasoned pro, here are some essential tips for creating smooth, creamy ice cream and avoiding common pitfalls.
Avoiding Common Ice Cream Making Mistakes
While making homemade ice cream is fairly straightforward, some common mistakes can affect the texture and taste. Here’s how to avoid them:
1. Ice Crystals Forming? Here’s How to Fix It
- Ice crystals can form if your ice cream is not churned properly or stored incorrectly. This happens when the mixture doesn’t freeze quickly enough during the churning process, or if it’s exposed to air during storage.
- Solution:
- Ensure your Cuisinart bowl is frozen thoroughly before use. If the bowl isn’t cold enough, the ice cream may not freeze quickly enough.
- Churn the mixture long enough to achieve a smooth consistency but not too long to create air pockets.
- When storing, make sure to cover the surface of the ice cream with plastic wrap or parchment paper to prevent air from reaching the surface. This will help prevent the formation of ice crystals.
- Store the ice cream in an airtight container to keep the cold in and prevent freezer burn.
2. Texture Too Hard or Too Soft?
- If your ice cream is too hard, it’s likely because it was frozen too long, or the freezing process wasn’t gradual enough. If it’s too soft, it might not have been churned enough or the ingredients weren’t cold enough before churning.
- Solution:
- For a harder consistency, store your ice cream in the freezer for a few hours.
- For softer ice cream, enjoy it immediately after churning for a soft-serve texture.
How to Make Soft Serve vs. Hard Ice Cream
There’s a distinct difference between soft serve ice cream and hard ice cream. Here’s how to adjust the process to achieve each:
1. Adjusting Churning Time for Soft Serve
- Soft serve ice cream has a lighter, fluffier texture that’s perfect for serving immediately after churning.
- Solution: To make soft serve, stop the churning process after 15-20 minutes (depending on your Cuisinart model). The ice cream will be soft but still have the creamy texture of churned ice cream. Serve immediately for the perfect soft-serve treat.
2. Adjusting Storage Temperature for Hard Ice Cream
For even better results, store it in a metal container, which retains cold more effectively than plastic.
Hard ice cream requires a bit more freezing time to achieve the traditional firm, scoopable texture.
Solution: After churning, transfer the ice cream to an airtight container and freeze it for 4-6 hours (or longer) until it hardens to your desired consistency.
Fun Flavor Combinations to Experiment
One of the best parts about making ice cream at home is the endless possibilities for flavor combinations! Once you’ve mastered the basics, try adding your own twists to create unique and exciting flavors. Here are some fun ideas to get you started:
1. Salted Caramel Pretzel
- Flavor combo: Salty and sweet
- Ingredients: Caramel sauce, crushed pretzels, a pinch of sea salt.
- How to make it: Make a classic vanilla base and swirl in homemade or store-bought caramel sauce towards the end of churning. Add crushed pretzels and a sprinkle of sea salt for that perfect salty-sweet contrast.
2. Peanut Butter Banana
- Flavor combo: Creamy and indulgent
- Ingredients: Peanut butter, ripe bananas, vanilla extract.
- How to make it: Blend mashed bananas with your ice cream base and churn until smooth. During the last 5 minutes of churning, add in peanut butter for a rich, nutty swirl.
3. Matcha Green Tea
- Flavor combo: Earthy and refreshing
- Ingredients: Matcha powder, vanilla extract, heavy cream.
- How to make it: Whisk in matcha powder into your base before churning. The matcha gives the ice cream a slightly bitter, earthy flavor that pairs perfectly with the creamy base. For extra creaminess, mix in a bit of sweetened condensed milk.
4. Chocolate Chip Cookie Dough
- Flavor combo: Classic and indulgent
- Ingredients: Chocolate chip cookie dough (raw), chocolate chips.
- How to make it: Mix chunks of raw cookie dough into a basic vanilla or chocolate ice cream base during the last 5 minutes of churning. Add a handful of chocolate chips for extra texture.
5. Lemon Blueberry Cheesecake
- Flavor combo: Tart and creamy
- Ingredients: Fresh blueberries, cream cheese, lemon zest.
- How to make it: Blend cream cheese into your base for a cheesecake flavor, then add lemon zest and blueberries during the last 5 minutes of churning.
Tip: When experimenting with flavors, be mindful of the churning time and the storage method. Adding mix-ins late in the churning process helps them stay intact and prevents them from being broken down too much.
Final Thoughts
Making homemade ice cream with a Cuisinart Ice Cream Maker can be a creative and rewarding process. With these tips and tricks, you’ll be able to avoid common mistakes, perfect your soft serve and hard ice cream, and experiment with exciting flavor combinations. Whether you’re crafting a classic or something new, you’ll enjoy the delicious results every time.
Your Homemade Cuisinart Ice Cream Maker Recipes Adventure Awaits
Making homemade ice cream with a Cuisinart Ice Cream Maker offers countless benefits, from the ability to choose your own fresh ingredients to the freedom of creating customizable flavors. The churning process ensures a smoother, creamier texture that store-bought ice cream simply can’t match. Plus, it’s an easy and enjoyable way to create treats that can be tailored to your taste and dietary needs.
We’ve shared a few of our favorite recipes to get you started, but the possibilities are truly endless! From classic vanilla to dairy-free coconut, these recipes are perfect for experimenting and discovering new combinations. We encourage you to try out the featured recipes and have fun creating your own signature flavors in the process.
We’d love to hear about your ice cream-making adventures! Share your favorite Cuisinart Ice Cream Maker recipes and any creative flavor ideas you’ve tried in the comments below. Happy churning!
And if you’re a fan of other frozen treats, don’t miss our Ice Cream recipes to make at Home for more unique flavor combinations.
