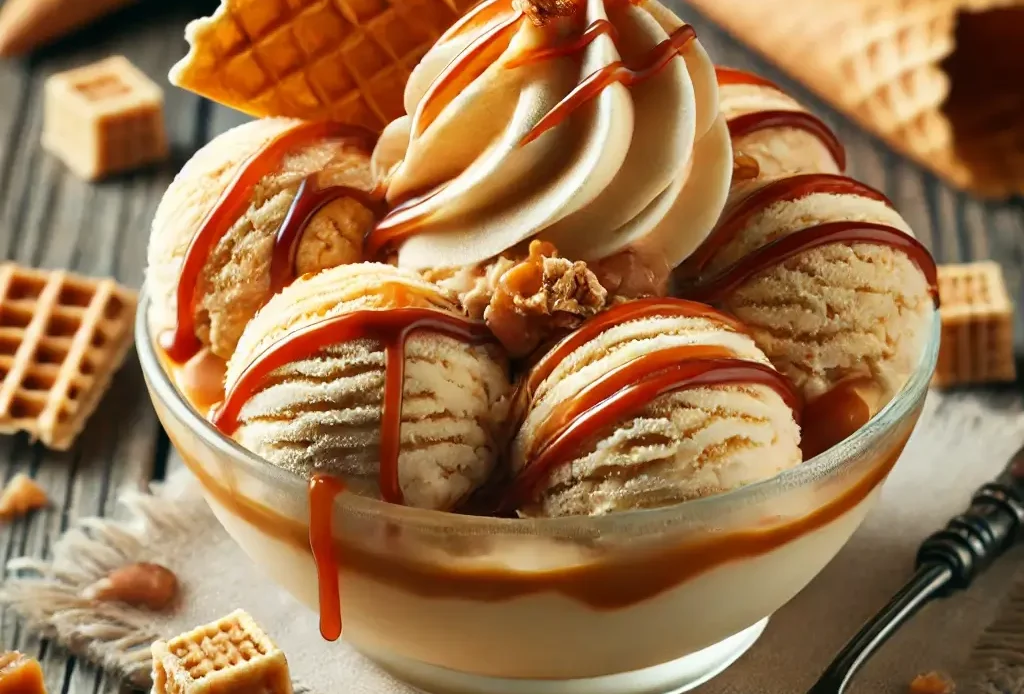
Caramel Cone Ice Cream is the perfect dessert for those who love a combination of creamy, rich ice cream with a crunchy, caramel-infused twist. This homemade version is incredibly easy to make and delivers a luscious caramel flavor with crispy waffle cone pieces, making every bite irresistibly delicious. Whether you’re a fan of classic ice cream flavors or looking for a fun new treat to try at home, this recipe is sure to impress.
In this guide, we’ll walk you through how to make homemade caramel cone ice cream using simple ingredients and easy steps. You’ll learn the best techniques to create a smooth and creamy ice cream base, how to swirl in rich caramel sauce, and the secret to keeping your waffle cone pieces crunchy. Plus, we’ll share expert tips on achieving the perfect consistency, preventing ice crystals, and creative serving ideas to make this dessert even more indulgent.
Ready to create a creamy, crunchy, and caramel-packed frozen treat? Let’s get started!
Why You’ll Love This Caramel Cone Ice Cream

If you’re a fan of sweet, creamy, and crunchy desserts, this homemade caramel cone ice cream is about to become your new favorite treat. Unlike store-bought versions, this recipe gives you complete control over the quality of ingredients, ensuring a rich, smooth texture with just the right amount of crunch from waffle cones. Whether you’re looking to impress guests or treat yourself to a delicious indulgence, this caramel cone ice cream offers the perfect balance of flavors and textures in every bite.
The Perfect Balance of Crunch and Cream
One of the standout features of caramel cone ice cream is its ability to combine two elements that many ice cream recipes overlook: creaminess and crunch. The rich caramel sauce swirled through a smooth, creamy ice cream base creates a satisfying contrast with crunchy waffle cone pieces. This balance ensures you enjoy each bite in a delightful way, where the caramel flavor coats your tongue while the cone bits add texture, making the experience of eating it all the more satisfying.
No-Churn vs. Ice Cream Maker – Which Method to Choose?
When it comes to making homemade ice cream, you have two main options: the no-churn method or using an ice cream maker. Both methods work well, but they come with distinct differences that may suit your preferences or kitchen setup.
- No-churn caramel cone ice cream is perfect for those who want an easy, hassle-free method. Simply mix the ingredients, pour them into a container, and freeze. This method doesn’t require any special equipment and delivers a creamy texture, though it may not be as smooth as ice cream made with a machine.
- Using an ice cream maker gives you a smoother, more refined texture, as the machine continuously churns the mixture while freezing, which prevents ice crystals from forming. If you have an ice cream maker on hand, this is the best option for a creamy, professional-style result.
Both methods create a delicious dessert, so your choice depends on convenience and the texture you’re after.
A Delicious Dessert for Any Occasion
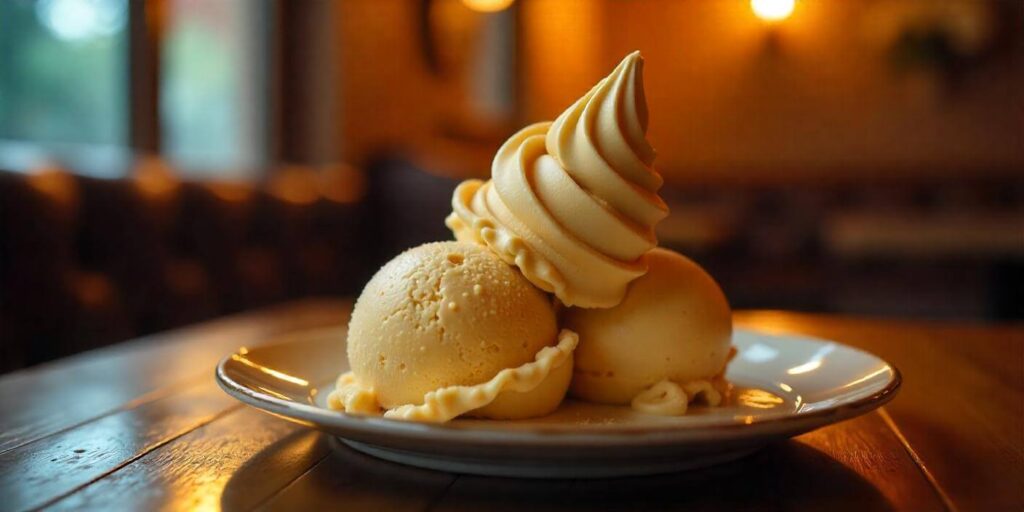
From summer parties to family dinners, caramel cone ice cream is the perfect dessert to enjoy on any occasion. The versatility of this recipe makes it a crowd-pleaser, whether you’re serving it as a standalone treat or incorporating it into an ice cream sundae. It also pairs beautifully with other desserts or is simply delicious on its own in a cone or bowl. Whether you’re celebrating a special occasion or just enjoying a sweet snack, this ice cream recipe brings the perfect balance of flavor and fun to any event.
Ingredients Needed for Caramel Cone Ice Cream
To make the perfect caramel cone ice cream, you’ll need a few key ingredients that come together to create the creamy, rich, and crunchy dessert you’re craving. Each component plays an important role in the texture, flavor, and overall experience of your homemade ice cream.
Key Ingredients for a Creamy Base
A smooth, rich ice cream base is the foundation of any great ice cream. To achieve this, you’ll need to use the following ingredients:
Heavy cream and sweetened condensed milk
The combination of heavy cream and sweetened condensed milk creates a luxuriously creamy base that is both smooth and indulgent. The heavy cream adds richness, while the sweetened condensed milk brings the perfect amount of sweetness and thickens the base, ensuring a velvety texture. This mix is perfect for creating the creamy mouthfeel you’ll love.
Vanilla extract for enhanced flavor
While the caramel flavor is the star of this ice cream, adding vanilla extract enhances the overall taste of the base. The vanilla provides a subtle depth of flavor that complements the sweetness of the caramel without overpowering it. A small splash of pure vanilla extract goes a long way in bringing out the creaminess of the ice cream.
Caramel Components for a Rich Swirl
Now comes the delicious part: the caramel swirl. This is what makes your ice cream extra special, adding that signature sweet and slightly salty flavor to the dessert. The key components are:
Homemade vs. store-bought caramel sauce
You have two choices when it comes to caramel sauce: you can either make your own homemade caramel sauce or opt for a store-bought version.
- Homemade caramel sauce is the way to go if you’re looking for a fresh, customizable flavor. It’s as simple as melting sugar, adding butter, and mixing in some heavy cream. The result is a rich, buttery caramel that swirls beautifully into the ice cream.
- Store-bought caramel sauce offers convenience and a consistent flavor if you’re short on time. However, it might be a bit sweeter than homemade, so you may want to adjust the sweetness of the ice cream base accordingly.
Crunchy Waffle Cones for Texture
The waffle cone pieces are what give your caramel cone ice cream its delightful crunch. You can either crush store-bought waffle cones or make your own at home. Waffle cone pieces are folded into the ice cream right before freezing, providing that perfect contrast to the smooth, creamy base. The light, crispy texture of the cone is a fun element that enhances every spoonful of ice cream.
Step-by-Step Guide to Making Caramel Cone Ice Cream

Making caramel cone ice cream is easier than you might think! With just a few simple steps, you can enjoy this creamy, crunchy treat from the comfort of your own home. Follow this guide to create a batch of homemade ice cream that’s sure to impress.
Preparing the Ice Cream Base
The first step in making this delicious caramel cone ice cream is to prepare the ice cream base. This creamy foundation will give your ice cream its rich texture and smooth consistency. Here’s how to do it:
- Mix the heavy cream and sweetened condensed milk in a large bowl. Use a whisk or electric mixer to blend these two ingredients together until smooth.
- Add the vanilla extract to the mixture. Stir it in gently to combine, ensuring the flavor is evenly distributed throughout the base.
- If you’re using an ice cream maker, transfer the mixture into the machine and churn according to the manufacturer’s instructions. If you’re making no-churn ice cream, skip to the next step after thoroughly mixing.
Adding Caramel Swirls and Waffle Cone Pieces
The next step is to incorporate the caramel and crunchy waffle cones into the ice cream for that signature flavor and texture. Here’s how to do it:
- Once your ice cream base is ready, pour it into a shallow, freezer-safe container.
- Drizzle the caramel sauce evenly over the base, making sure it swirls throughout. If you made homemade caramel, you’ll have a fresh, smooth caramel that adds richness to the mix.
- Add crushed waffle cone pieces to the ice cream base. Gently fold the pieces in so they’re evenly distributed, but don’t over-mix. You want the cones to remain crunchy even after freezing, giving that delightful texture contrast when eating.
- For a more swirled effect, you can add additional caramel sauce on top and use a spoon or knife to create beautiful, swirly patterns.
Freezing for the Perfect Texture
The final step is freezing the ice cream until it’s firm and ready to enjoy. Proper freezing is essential to achieving the right smooth, creamy texture and avoiding ice crystals.
- Cover the container with plastic wrap or an airtight lid to prevent any freezer burn.
- Place the container in the freezer and let the ice cream freeze for at least 4-6 hours or overnight for the best results.
- Once frozen, remove the ice cream from the freezer about 5 minutes before serving. This helps soften it slightly, making it easier to scoop.
Tips & Tricks for the Best Homemade Ice Cream
Making caramel cone ice cream at home is fun and rewarding, but to ensure the best results, there are a few pro tips you’ll want to follow. These tips will help you achieve the perfect texture, flavor, and storage for your ice cream, so you can enjoy it at its finest every time.
How to Keep Ice Cream Smooth and Creamy
One of the biggest challenges when making homemade ice cream is ensuring it stays smooth and creamy without becoming icy. Here’s how to achieve that velvety texture:
- Use full-fat cream: The higher the fat content, the creamier the ice cream will be. Make sure to use heavy cream or double cream for the best results.
- Churn the mixture properly: If you’re using an ice cream maker, follow the manufacturer’s instructions for churning times. Churning the ice cream while freezing helps incorporate air and keeps it creamy.
- Add stabilizers if needed: For extra creaminess, you can add a small amount of cornstarch or guar gum to the base. This helps prevent ice crystals from forming and keeps the ice cream smoother for longer.
- Avoid overfreezing: While it’s important to freeze your ice cream to firm it up, overfreezing can make it harder and less creamy. Aim for a perfect balance of softness when you scoop.
Preventing Ice Crystals in No-Churn Ice Cream
If you’re using the no-churn method, ice crystals can be a concern since you’re not constantly churning the mixture while it freezes. Here’s how to prevent ice crystals and keep your no-churn ice cream creamy:
- Mix the ingredients thoroughly: The more evenly you mix the base, the fewer ice crystals will form. Be sure to incorporate the heavy cream and sweetened condensed milk thoroughly before freezing.
- Add alcohol: A tablespoon or two of vodka or another clear alcohol can help prevent ice crystals. Alcohol doesn’t freeze and can help keep your ice cream smoother, though don’t worry—you won’t taste it.
- Freeze in a shallow pan: If possible, freeze your ice cream in a shallow container. This allows it to freeze evenly and helps maintain the creamy consistency. The smaller the surface area of the ice cream, the less likely ice crystals will form.
Best Ways to Store Caramel Cone Ice Cream
Proper storage is crucial for maintaining the texture and flavor of your caramel cone ice cream. Follow these storage tips to keep your homemade ice cream fresh:
- Use an airtight container: When storing your ice cream in the freezer, make sure to use an airtight container. This prevents ice crystals from forming and protects the ice cream from freezer burn.
- Cover with plastic wrap: To prevent any freezer odors from contaminating the flavor, place a layer (which acts as a barrier) of plastic wrap directly on the surface of the ice cream before sealing the container.
- Store at the right temperature: Keep your ice cream at a consistent freezing temperature (around -18°C or 0°F) to maintain its texture and flavor. If the freezer fluctuates in temperature, the ice cream may become too soft or develop ice crystals.
- Let it sit before serving: If you’ve had your ice cream in the freezer for a while, let it sit at room temperature for about 5-10 minutes before scooping. This softens it just enough to make scooping easier without compromising texture.
Variations & Serving Ideas for Caramel Cone Ice Cream

While caramel cone ice cream is already a treat on its own, there are plenty of ways to customize it or serve it in creative ways. From rich chocolate drizzles to dairy-free options, here are some fun variations and serving ideas to elevate your ice cream experience.
Chocolate Drizzle and Toppings for Extra Indulgence
To make your caramel cone ice cream even more indulgent, why not add a chocolate drizzle or extra toppings? These additions can take your homemade ice cream to the next level, creating a dessert that’s decadent and visually stunning.
- Chocolate ganache: Melt dark or milk chocolate with a bit of heavy cream to make a smooth chocolate ganache. Drizzle it over your ice cream for an extra rich and glossy finish.
- Crushed nuts: For added crunch, sprinkle crushed almonds, pecans, or hazelnuts on top of the caramel cone ice cream. The nutty flavor pairs wonderfully with the sweetness of the caramel.
- Chopped candies or chocolate chunks: Add a sweet surprise by sprinkling bits of your favorite chocolate bars or candies like M&Ms, Reese’s Pieces, or even caramel-filled chocolates on top.
- Whipped cream: For a classic touch, top your ice cream with a swirl of whipped cream. You can even add a cherry on top for the ultimate sundae look.
Making It Dairy-Free or Vegan
If you’re looking to make this dessert suitable for those with dairy intolerances or following a vegan lifestyle, it’s easy to make adjustments without compromising on taste. Here’s how to customize your caramel cone ice cream:
- Use dairy-free cream: Instead of heavy cream, opt for a coconut cream or a non-dairy whipping cream. These alternatives will provide the richness and creaminess needed for a smooth base.
- Vegan sweetened condensed milk: There are several brands of vegan sweetened condensed milk made from coconut or almond milk that you can use. Alternatively, you can make your own by simmering coconut milk with sugar until thickened.
- Replace the caramel sauce: Look for dairy-free caramel sauce in stores or make your own with vegan butter, brown sugar, and coconut cream for a delicious, dairy-free caramel swirl.
- Use dairy-free waffle cones: Many brands offer vegan-friendly waffle cones, or you can make your own by substituting regular butter for a dairy-free alternative.
By making these simple swaps, you’ll have a dairy-free or vegan caramel cone ice cream that’s just as creamy and indulgent as the original.
Creative Ways to Serve – Cones, Sundaes & More
Now that you’ve got your caramel cone ice cream ready, it’s time to think about how to serve it in fun and creative ways. Here are some ideas to turn your ice cream into a show-stopping dessert:
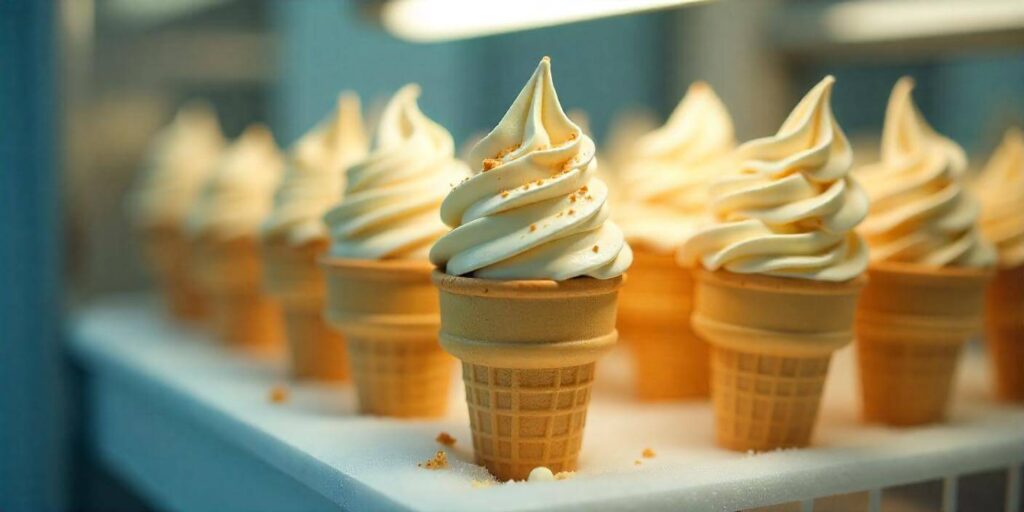
- Ice cream cones: The classic choice! Scoop your ice cream into waffle cones for the ultimate handheld treat. You can dip the tops of the cones in chocolate or sprinkles before adding the ice cream for extra flair.
- Sundaes: For a build-your-own sundae bar, serve your caramel cone ice cream with a variety of toppings, such as chocolate sauce, marshmallow fluff, and candied fruits. Let guests customize their sundaes to their liking.
- Ice cream sandwiches: Sandwich the caramel cone ice cream between two soft cookies like chocolate chip or oatmeal for a fun, handheld dessert.
- Affogato-style: For a twist on traditional ice cream servings, pour a shot of hot espresso or strong coffee over a scoop of caramel cone ice cream for an affogato-style dessert that’s both rich and refreshing.
- Layered ice cream parfaits: Layer the caramel cone ice cream with crumbled waffle cones, whipped cream, and extra caramel sauce in tall glasses to create a beautiful and indulgent parfait.
These creative serving ideas make your caramel cone ice cream not just a dessert but an experience that everyone will love!
Savor Every Bite of Your Homemade Caramel Cone Ice Cream
There’s nothing quite like the indulgence of homemade caramel cone ice cream. Whether you’re enjoying it on a warm day, celebrating a special occasion, or simply craving a sweet treat, this dessert has it all: creamy texture, rich caramel flavor, and a delightful crunch from the waffle cone pieces.
By following the simple steps in this guide, you’ve created a dessert that can rival anything you’d find at an ice cream shop—and you’ve done it right from your kitchen! Whether you go for the classic recipe, dairy-free variation, or get creative with your toppings, each bite of your caramel cone ice cream is sure to bring joy.
So the next time you’re in the mood for a delicious homemade treat, remember this recipe and make it your own. Enjoy the sweetness, the crunch, and the creamy goodness that comes with every scoop.
