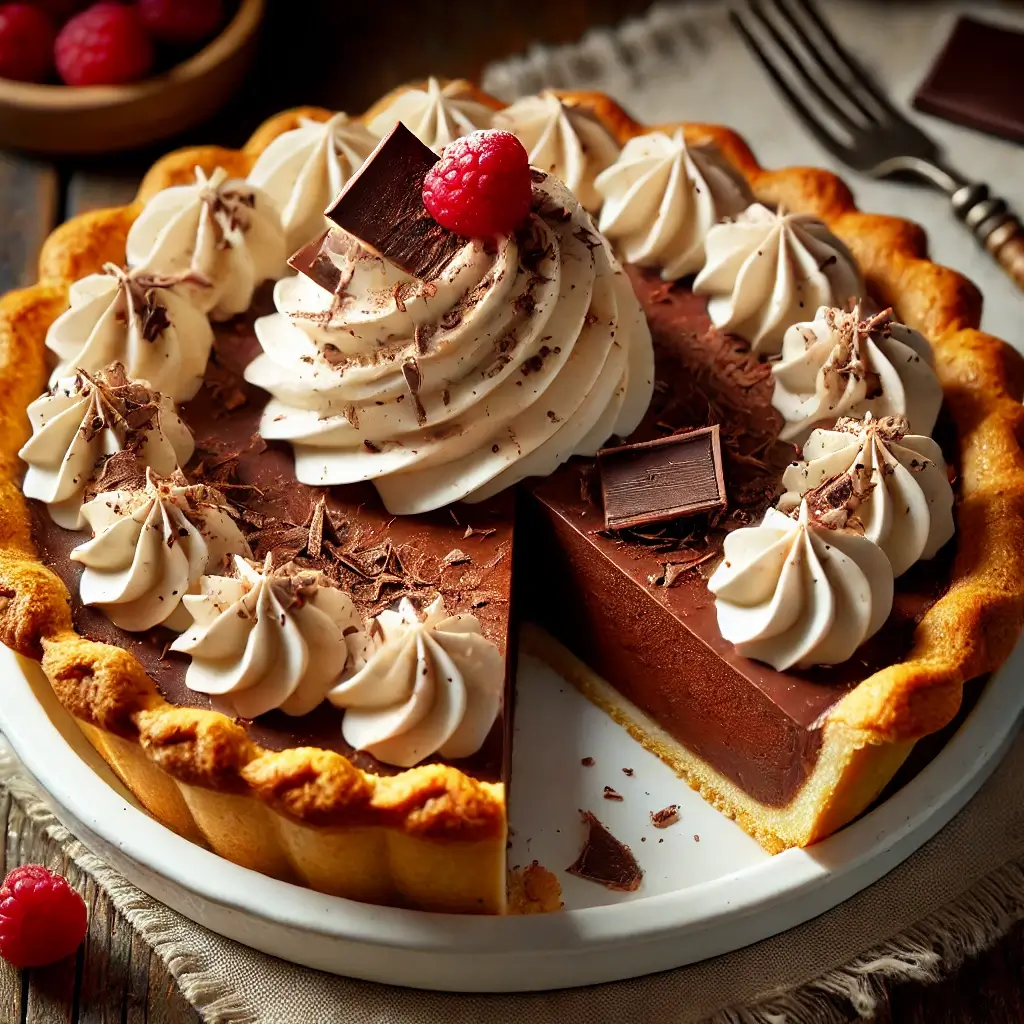
Is there anything more indulgent than a rich, creamy chocolate pie? Whether you are a chocolate lover or looking for the perfect dessert for your next gathering, this chocolate pie recipe is sure to impress. With its silky-smooth filling, buttery crust, and just the right amount of sweetness, this pie is the ultimate treat for any occasion.
In this post, I will walk you through a step-by-step guide to making the perfect chocolate pie. You will learn:
- The best type of chocolate to use for a deep, rich flavor
- How to make a perfectly thick and creamy chocolate filling
- Tips for choosing between a flaky pastry crust or an easy graham cracker crust
- How to store and serve your chocolate pie for maximum freshness
Whether you are a beginner or an experienced baker, this homemade chocolate pie recipe will quickly become your go-to dessert. So grab your ingredients, and let’s get started.
Why You’ll Love This Chocolate Pie Recipe
There are countless reasons why this chocolate pie recipe will become your new favorite dessert. From the rich, velvety filling to the easy-to-follow instructions, this pie checks all the boxes for both seasoned bakers and beginners alike.
Creamy, Rich, and Full of Chocolate Flavor
The chocolate filling is the star of this pie. It’s made with high-quality cocoa powder and chocolate for an intense, rich flavor that melts in your mouth. The combination of ingredients creates a perfectly smooth, creamy texture that’s both indulgent and comforting. If you love the deep taste of dark chocolate or the sweetness of milk chocolate, this recipe can be customized to suit your taste preference, ensuring the perfect balance of flavors.
Simple Ingredients, Easy to Make at Home
One of the best things about this chocolate pie recipe is how simple it is to prepare. You don’t need any fancy equipment or hard-to-find ingredients. With just a few basic pantry staples like butter, sugar, eggs, and cocoa powder, you can create a decadent pie that’s sure to impress. The recipe also includes easy instructions for making your own pie crust or using a pre-made option to save time.
Perfect for Any Occasion – Holidays, Birthdays & More
This chocolate pie is versatile enough to fit any occasion, whether it’s a cozy family dinner, a holiday feast, or a birthday celebration. Its rich, comforting flavors make it the perfect dessert for special events and gatherings. It’s a crowd-pleaser that’s as impressive as it is delicious. Whether you’re serving it at Thanksgiving, Christmas, or a summer party, this pie will surely be the highlight of your meal.
Ingredients Needed for the Best Chocolate Pie
The key to a truly indulgent chocolate pie lies in the quality of ingredients. From rich chocolate to the perfect pie crust, each component plays a crucial role in creating the perfect balance of flavors and textures. Here’s a breakdown of the essential ingredients you’ll need for this best chocolate pie recipe.
The Best Type of Chocolate to Use
When making a chocolate pie, the type of chocolate you choose will significantly impact the flavor. You can go for a combination of these options, depending on your personal preference:
- Dark Chocolate: For a rich, slightly bitter flavor, dark chocolate (at least 60% cocoa) is the best choice. It gives the filling a deep, intense chocolate taste that pairs perfectly with the sweetness of the other ingredients.
- Cocoa Powder: Unsweetened cocoa powder adds depth and helps thicken the filling. It’s essential for achieving the smooth texture and dark chocolate taste. You can use Dutch-processed cocoa for a smoother, milder flavor, or natural cocoa powder for a more intense, slightly acidic taste.
- Chocolate Chips: If you prefer a chunkier texture, chocolate chips work great as they melt evenly and add small bits of chocolate in each bite. They’re perfect for those who want extra chocolatey bites throughout the pie.
Choosing the Perfect Pie Crust
The pie crust you choose can make or break the overall texture of your chocolate pie. There are two common options:
- Graham Cracker Crust: For a quick, no-bake option, a graham cracker crust is ideal. It adds a slightly sweet, crumbly texture that complements the smooth chocolate filling. It’s the preferred choice for many because it’s easy to prepare and enhances the overall flavor with minimal effort.
- Traditional Pastry Crust: If you’re looking for a more flaky and buttery crust, a traditional pie crust (whether homemade or store-bought) will do the trick. This option adds a satisfying crispiness and richness that contrasts nicely with the creamy filling. It’s a bit more time-consuming but offers a classic dessert experience.
Additional Ingredients for a Flavor Boost
To elevate the flavor and create a perfectly balanced filling, you’ll need a few additional ingredients:
- Vanilla Extract: A splash of vanilla extract adds a touch of warmth and complexity to the chocolate flavor, rounding out the sweetness without overpowering it. It enhances the overall depth of the pie, making the chocolate taste even more decadent.
- Butter: Butter is crucial for creating a smooth and velvety chocolate filling. It adds richness and helps the filling set properly. Use unsalted butter for better control over the flavor balance.
- Cornstarch: Cornstarch acts as a thickening agent in the filling, ensuring it sets up firm and smooth. It creates the desired custard-like consistency without altering the flavor.
- Egg Yolks: Egg yolks provide structure and creaminess to the filling. When combined with the other ingredients, they help the pie filling set into a smooth, rich texture that holds its shape when sliced.
These ingredients, along with the base chocolate, work together to create the creamy, decadent chocolate pie that is sure to be a hit at your next gathering.
Step-by-Step Instructions on How to Make Chocolate Pie
Making a chocolate pie may sound like a daunting task, but with these simple, step-by-step instructions, you’ll be able to make a delicious, homemade chocolate pie with ease. From preparing the pie crust to creating a smooth, silky chocolate filling, this guide will take you through each stage to ensure perfect results.
Preparing the Pie Crust
Before you can fill your pie, you need to get the pie crust ready. Depending on your preference and time constraints, there are two options to consider:
- Pre-made Pie Crust: If you want a shortcut, you can use a pre-made pie crust from the store. Just follow the instructions on the package to bake it if it requires pre-baking, or simply fill it with the chocolate filling and refrigerate. This option saves time and effort while still providing a delicious result.
- Homemade Pie Crust: If you prefer a flaky, buttery homemade crust, you’ll need to make it from scratch. Combine flour, butter, and a pinch of salt, then add ice water to form a dough. Roll it out, place it into your pie dish, and bake it according to the recipe instructions. If the filling is not baked, you may need to blind bake the crust (cover it with parchment paper and fill with pie weights) to avoid sogginess. Let it cool completely before adding the chocolate filling.
Making the Chocolate Filling
Now for the heart of the pie—the chocolate filling. This process involves several key techniques to get that creamy, smooth consistency and rich flavor.
- Combine Wet Ingredients: Start by whisking together eggs, sweetened condensed milk, sugar, and a pinch of salt in a medium saucepan. This will form the base for your chocolate custard.
- Add Cocoa Powder: Add unsweetened cocoa powder to the wet ingredients. Whisk well until fully combined and smooth. The cocoa powder will provide that rich, deep chocolate flavor we all love.
- Cook the Mixture: Place the saucepan on medium heat, stirring constantly. Once the mixture starts to warm up, bring it to a gentle simmer while continuing to stir. This step is crucial for evenly cooking the filling and preventing any clumps or burning.
- Thickening the Filling: Gradually add cornstarch, which will help thicken the filling. Continue stirring until the mixture has thickened to the consistency of a pudding. Be patient, as this may take a few minutes. You want it thick enough to hold its shape when poured into the pie crust.
- Add Butter and Vanilla: Once the filling has thickened, remove it from the heat. Stir in the butter (for extra creaminess) and a splash of vanilla extract to balance the flavors. The butter will also help to create a glossy finish in the filling.
- Final Mixing: Fold in your chosen chocolate chips or chopped chocolate to give the filling extra richness. Let the chocolate melt completely for a velvety texture.
Assembling and Chilling the Pie
With your pie crust and chocolate filling ready, it’s time to assemble and let everything set.
- Pour the Filling into the Crust: Carefully pour the chocolate filling into the prepared pie crust. Use a spatula to smooth the top evenly and remove any air bubbles.
- Chill the Pie: Place the pie in the refrigerator for at least 3 hours (or overnight, if possible) to allow the filling to fully set. This step is important for achieving the perfect slice with a firm, smooth filling.
- Serve: Once the pie has chilled, it’s ready to be served! Top with whipped cream, chocolate shavings, or your favorite topping. Slice and enjoy!
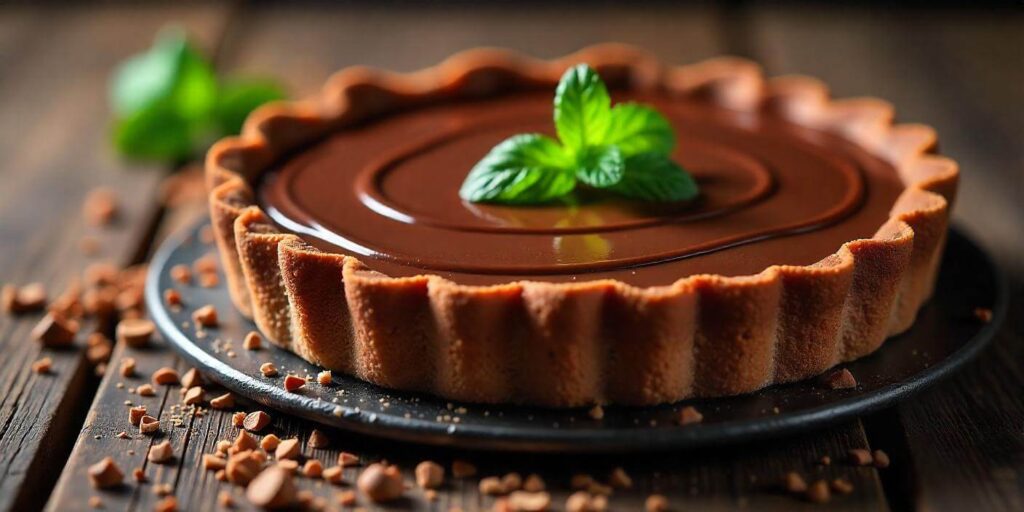
Optional: Adding a Chocolate Ganache Layer
For an extra layer of decadence, you can add a chocolate ganache layer on top of the pie. This will make the pie even more indulgent and visually impressive.
- Make the Ganache: Heat heavy cream in a saucepan until it just begins to simmer. Pour it over chopped chocolate (dark, milk, or a combination). Stir until the chocolate is completely melted and smooth.
- Top the Pie: Pour the ganache over the chilled chocolate pie, spreading it out evenly with a spatula. Allow the ganache to set in the fridge for about an hour, and you’ll have a glossy, rich topping that complements the creamy chocolate filling underneath.
This extra ganache layer is optional, but it definitely adds an indulgent touch if you want to take your pie to the next level!
Tips & Tricks for the Perfect Chocolate Pie
To ensure your chocolate pie turns out perfectly every time, here are some helpful tips and troubleshooting advice. These baking tips will help you avoid common pitfalls and make the most of your pie-making experience.
How to Prevent a Runny Chocolate Pie Filling
One of the most common issues when making a chocolate pie is a runny filling that doesn’t set properly. To prevent this, follow these tips:
- Properly Thicken the Filling: Ensure you cook the chocolate mixture long enough for it to thicken, especially after adding the cornstarch. The filling should coat the back of a spoon and have a custard-like consistency.
- Don’t Skip the Chilling Time: After pouring the filling into the crust, be sure to chill the pie for at least 3 hours (ideally, overnight). This allows the filling to fully set and firm up.
- Use the Right Amount of Cornstarch: If your pie is too runny, you might not have used enough cornstarch to thicken the mixture. Be sure to measure it accurately. If you’re in a pinch, you can add a little more cornstarch in the cooking process (just be careful not to overdo it).
Making a No-Bake Chocolate Pie Alternative
If you prefer an even easier version of chocolate pie, try this no-bake chocolate pie recipe. It’s perfect for hot weather or when you don’t want to spend too much time in the kitchen. Here’s how to make it:
- Use a Pre-made Crust: Opt for a graham cracker crust or a store-bought chocolate cookie crust to save time. These no-bake crusts are ready to go and pair perfectly with a cool filling.
- Make the Filling with Whipped Cream: Instead of cooking the chocolate filling, you can make a no-bake filling by combining sweetened condensed milk, whipped cream, and melted chocolate. This will give you a light and airy texture without the need for baking.
- Chill Thoroughly: Even though this version doesn’t require baking, it still needs time to set in the fridge. Be sure to chill the pie for at least 4 hours or overnight to get the right consistency.
How to Store and Freeze Chocolate Pie Properly
Proper storage is essential for keeping your chocolate pie fresh and delicious. Here’s how to store and freeze your pie effectively:
- Storing in the Refrigerator:
- Cover the Pie: After the pie has chilled and set, cover it tightly with plastic wrap or aluminum foil. You can also use a pie keeper to prevent any odors from contaminating the flavor.
- Refrigerate for Up to 3 Days: Chocolate pie can be stored in the refrigerator for about 2-3 days. If you plan to eat it within that timeframe, it will stay fresh and creamy.
- Freezing Chocolate Pie:
- Freeze Without Toppings: If you want to freeze the pie, it’s best to do so without toppings like whipped cream or ganache, as these don’t freeze well and can become watery when thawed.
- Wrap and Seal: To freeze, wrap the pie tightly in plastic wrap and then cover it with aluminum foil. This will protect it from freezer burn.
- Thawing: When you’re ready to serve the pie, transfer it to the fridge to thaw overnight. Avoid thawing at room temperature, as this may cause the filling to become too soft or watery.
By following these storage and freezing tips, you can make your pie ahead of time and still enjoy the same great taste when you’re ready to serve it!
Look at this
Check out these recipes
Tips & Tricks for the Perfect Chocolate Pie
Making a perfect chocolate pie doesn’t have to be difficult. With the right techniques and a few troubleshooting tips, you’ll avoid common issues and create a pie that’s both creamy and satisfying. Here are some helpful tips and tricks to ensure your pie turns out flawlessly.
How to Prevent a Runny Chocolate Pie Filling
One of the most frustrating problems when making chocolate pie is a runny filling. If your filling doesn’t set properly, it can lead to a messy slice. Here’s how to avoid this issue:
- Thicken the Filling Correctly: To achieve the right consistency, make sure you cook the filling long enough. After adding cornstarch, continue to stir the mixture until it thickens to a custard-like texture. It should be thick enough to coat the back of a spoon and hold its shape when you pour it into the pie crust.
- Chill the Pie Well: After assembling the pie, chill it for at least 3 hours or overnight. This gives the filling enough time to set and firm up. If you skip this step, the pie might not hold together when sliced.
- Check Your Cornstarch Measurement: If your pie is still too runny, you may not have used enough cornstarch to thicken it. Ensure you measure it accurately, and if needed, add a little more to the filling as it simmers. Just be careful not to add too much, as this can affect the texture.
Making a No-Bake Chocolate Pie Alternative
If you want a quicker and easier version of chocolate pie, you can make a no-bake chocolate pie that requires no oven time. Here’s how to make it:
- Refrigerate to Set: For the best results, refrigerate the pie for at least 4 hours or overnight. This ensures the filling becomes thick and firm without needing to bake.
- Use a Pre-made Crust: To save time, opt for a pre-made graham cracker crust or cookie crust. These are great for no-bake pies and offer a nice, crumbly base that pairs well with the creamy filling.
- Prepare the No-Bake Filling: Instead of cooking the filling on the stovetop, you can make it with melted chocolate, sweetened condensed milk, and whipped cream. Simply combine the ingredients, whisk until smooth, and pour the mixture into the crust. The filling will firm up as it chills.
How to Store and Freeze Chocolate Pie Properly
Proper storage is key to keeping your chocolate pie fresh and delicious, whether you’re enjoying it the next day or preparing it in advance.
- Refrigerating the Pie:
- Cover Tightly: Once the pie is set, cover it tightly with plastic wrap or aluminum foil. You can also store it in a pie keeper if you have one to protect it from odors and prevent it from drying out.
- Refrigerate for 2-3 Days: A freshly baked chocolate pie will stay fresh in the refrigerator for up to 3 days. Just be sure to refrigerate it promptly after it has cooled.
- Freezing Chocolate Pie:
- Freeze Without Toppings: If you need to freeze your pie, it’s best to freeze it without toppings like whipped cream or ganache, as these can become watery when thawed.
- Wrap for Freezing: Wrap the pie tightly in plastic wrap and then cover it with aluminum foil to protect it from freezer burn.
- Thawing: To thaw, place the pie in the refrigerator overnight. Avoid thawing it at room temperature, as this can cause the filling to become too soft or runny.
By following these tips, you can ensure that your chocolate pie is perfectly set, delicious, and ready to enjoy whenever you want.
Serving Suggestions & Variations of Chocolate Pie Recipe
This chocolate pie is versatile and can easily be customized to suit different tastes and dietary needs. Whether you’re looking for the perfect topping or a way to make it vegan or gluten-free, here are some ideas to help you personalize this dessert.
Toppings to Elevate Your Chocolate Pie
The right toppings can take your chocolate pie to the next level, adding flavor, texture, and visual appeal. Here are some delicious ideas:
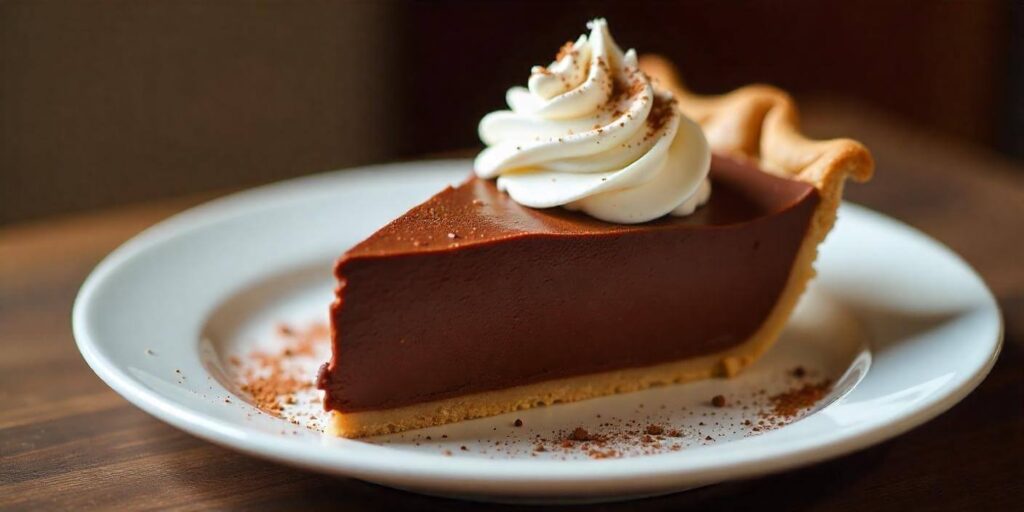
- Whipped Cream: A dollop of fresh whipped cream is a classic topping that complements the creamy chocolate filling. You can make it from scratch with heavy cream and a little sugar or use store-bought whipped topping.
- Chocolate Shavings: Add some extra chocolatey richness by topping your pie with chocolate shavings or finely chopped chocolate. This adds a nice texture and an extra burst of flavor.
- Chopped Nuts: For a bit of crunch, sprinkle some chopped nuts on top, such as pecans, walnuts, or hazelnuts. The toasted nuts will complement the creamy chocolate filling and add a delightful contrast in texture.
- Fresh Berries: If you want to add a touch of freshness and acidity, consider adding fresh berries like raspberries, strawberries, or blueberries. These provide a natural sweetness and color that pairs well with chocolate.
- Caramel Sauce: Drizzle some rich caramel sauce over the top for an indulgent twist. The sweet, buttery flavor of the caramel will enhance the chocolate pie’s richness.
Variations – Vegan, Keto & Gluten-Free Chocolate Pie Options
If you have specific dietary restrictions or preferences, there are simple ways to modify this recipe to suit your needs:
- Vegan Chocolate Pie:
- Replace the butter with vegan butter or coconut oil.
- Use a plant-based milk like almond milk or coconut milk instead of dairy.
- For the filling, use tofu or cashews blended with melted vegan chocolate to achieve a creamy, dairy-free texture.
- Choose a vegan pie crust, or make your own with crushed vegan cookies and coconut oil.
- Keto Chocolate Pie:
- For a low-carb version, substitute the sugar with erythritol or another keto-friendly sweetener.
- Use a keto-friendly pie crust, such as one made with almond flour and butter.
- For the filling, use unsweetened chocolate, heavy cream, and a low-carb sweetener to keep the carbs low while maintaining a rich, decadent flavor.
- Gluten-Free Chocolate Pie:
- Use a gluten-free pie crust, which can be made with almond flour, rice flour, or a gluten-free cookie base.
- Make sure all other ingredients, including the chocolate and cocoa powder, are gluten-free. Many dark chocolates are naturally gluten-free, but always double-check labels.
Pairing Ideas – Best Drinks & Sides for Chocolate Pie
Pairing your chocolate pie with the right drinks and sides can elevate the dessert experience. Here are some ideas to complement your pie:
- Coffee: A rich cup of coffee pairs beautifully with chocolate. Whether you prefer a bold espresso, a latte, or a simple black coffee, the slight bitterness of coffee balances the sweetness of the pie.
- Red Wine: If you’re looking for a wine pairing, red wine is an excellent choice. Try a merlot, cabernet sauvignon, or port wine, which complements the deep chocolate flavor.
- Milk: The classic pairing of milk with chocolate is always a hit, especially for kids or those who prefer something simple and comforting.
- Whipped Cream or Ice Cream: On the side, whipped cream or a scoop of vanilla ice cream can add a creamy element that balances the richness of the chocolate pie.
- Fruit Salads: To add a refreshing contrast, serve the chocolate pie alongside a fresh fruit salad with berries, citrus, or tropical fruits. The tartness of the fruit will cut through the richness of the pie.
- Nuts and Cheeses: For a more sophisticated pairing, consider serving the pie with a small selection of cheeses and toasted nuts. Rich cheeses like brie or gouda and roasted nuts like almonds or pistachios can create a delightful contrast to the chocolate pie’s creamy texture.
By experimenting with different toppings, variations, and pairings, you can create a chocolate pie that’s tailored to your tastes and perfect for any occasion.
FAQ: Everything You Need to Know About Chocolate Pie Recipe
Having a few frequently asked questions (FAQs) on hand can help guide your readers and provide them with helpful tips as they make their chocolate pie. Below are some common questions and answers to make sure your readers have a smooth experience from start to finish.
1. How do I make my chocolate pie filling thicker?
If your filling is not thick enough or is too runny, here are some solutions:
- Cook it longer: If you notice that your filling is too thin while cooking, keep stirring over low to medium heat and allow it to cook longer. The cornstarch needs time to activate and thicken the mixture.
- Add more cornstarch: If your pie filling still seems runny, you can mix a little more cornstarch with water and add it to the mixture while it’s on the stovetop. Be sure to stir continuously to avoid clumping.
- Chill properly: After filling the pie, refrigerate it for a few hours or overnight. This will help the filling firm up and set properly.
2. Can I use a store-bought pie crust for chocolate pie?
Yes, you can definitely use a store-bought pie crust to save time and effort. There are several options available, such as:
- Graham cracker crust: This is a popular choice, offering a slightly sweet and crunchy base that complements the creamy chocolate filling.
- Pre-made pastry crust: If you prefer a traditional pie crust, you can use a pre-baked pie crust or one that needs to be baked according to the package instructions. Just make sure to allow it to cool before filling it.
3. How do I make chocolate pie with a dairy-free or vegan option?
To make a vegan or dairy-free chocolate pie, you can easily swap out some ingredients:
- Butter: Use vegan butter or coconut oil as a replacement for dairy butter.
- Milk: Replace dairy milk with almond milk, coconut milk, or another plant-based milk.
- Cream: Use coconut cream or non-dairy whipped cream for a creamy consistency in the filling.
- Chocolate: Ensure the chocolate you use is dairy-free. Many dark chocolates are naturally vegan, but always check the label.
For a vegan pie crust, you can use vegan graham crackers or make a crust with almond flour and coconut oil.
4. Can I freeze chocolate pie?
Yes, you can freeze chocolate pie, but there are a few things to keep in mind:
- Freeze without toppings: It’s best to freeze the pie without any toppings, like whipped cream or ganache, as they may not freeze well and could change texture when thawed.
- Wrap tightly: Wrap the pie tightly in plastic wrap and cover it with aluminum foil or place it in an airtight container to prevent freezer burn.
- Thawing: To thaw, place the pie in the refrigerator for several hours or overnight to allow it to come back to the correct consistency. Avoid thawing it at room temperature, as this may cause the filling to become too soft.
Frozen chocolate pie can be kept for up to 1-2 months, making it an excellent option for make-ahead desserts.
5. How can I make a keto-friendly chocolate pie?
To make a keto chocolate pie, focus on low-carb ingredients:
- Pie crust: Use a keto-friendly crust made with almond flour, coconut flour, or a crushed low-carb cookie base.
- Sweeteners: Replace sugar with erythritol, stevia, or another keto-approved sweetener.
- Filling: For the filling, use unsweetened cocoa powder, heavy cream, butter, and a low-carb sweetener like erythritol. This will keep the net carbs low while still maintaining a rich, chocolatey taste.
- Toppings: Avoid sugary toppings and instead, consider using whipped cream made with heavy cream or sugar-free whipped cream.
6. Can I use chocolate chips instead of cocoa powder?
Yes, you can use chocolate chips in place of cocoa powder for a more intense chocolate flavor. However, keep in mind that chocolate chips are typically sweetened, so you may need to adjust the sugar in the recipe accordingly.
To use chocolate chips in the filling:
- Melt the chocolate chips in the microwave or over a double boiler before incorporating them into the mixture.
- You may need to adjust the ratio of chocolate chips and other ingredients to maintain the right consistency. Typically, dark chocolate chips work best for a rich, balanced flavor.
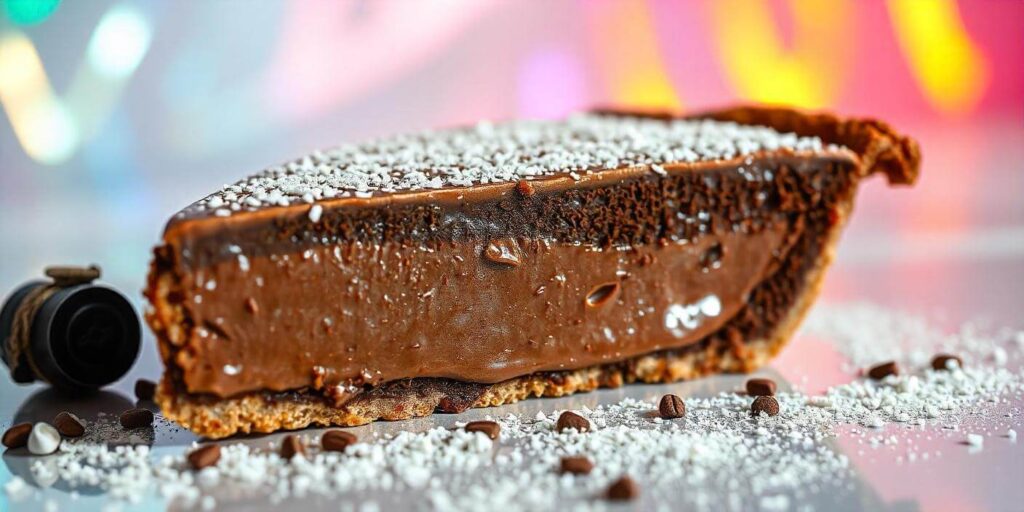
7. How do I know when my chocolate pie is done setting?
When your chocolate pie is done setting, it should have a firm and smooth texture. Here’s how to check:
- Touch Test: After refrigerating for the required time (usually 3-4 hours or overnight), gently press the center of the filling. It should feel firm to the touch and hold its shape when sliced.
- Slice Test: When cutting into the pie, the filling should not ooze or run out. It should slice cleanly with a smooth and velvety texture.
8. What is the best way to serve chocolate pie?
Chocolate pie is best served chilled and topped with whipped cream, chocolate shavings, or fresh berries. You can also add a drizzle of chocolate ganache or caramel sauce for an extra indulgent touch. For drinks, coffee, red wine, or a glass of milk are great pairings.
These FAQs should help clear up any confusion and ensure your readers make the perfect chocolate pie every time!
Best Chocolate Pie Recipe: Easy, Creamy & Irresistible
After following these steps, tips, and tricks, you’ll have a delicious, indulgent chocolate pie that’s perfect for any occasion. Whether you’re enjoying it at a family gathering, serving it at a dinner party, or simply treating yourself to a sweet dessert, this chocolate pie will surely impress. The rich, creamy filling combined with a buttery, crisp crust creates a dessert that’s both satisfying and unforgettable.
Feel free to experiment with different variations, like making it vegan, keto, or gluten-free, to suit your dietary preferences. The beauty of this recipe is its versatility – you can customize it to your taste and dietary needs while still maintaining its indulgent, chocolatey goodness.
Remember, the key to a perfect chocolate pie is in the details: choosing the right ingredients, allowing enough chilling time for the filling to set, and adding your personal touch with toppings or flavor variations. And don’t forget to pair it with a great drink or side for the ultimate dessert experience.
If you’re a fan of easy and irresistible desserts, don’t miss out on our Chocolate Trilogy Mousse—a rich, layered dessert that will impress your guests! Or, for a fruity twist, check out our Peach Smoothie Recipe, a creamy and refreshing drink perfect for any time of the day.